Want to know how to connect front panel cables to your motherboard? You’ve come to the right place!
Today, I’ll quickly walk you through all you need to know about front panel cables, including what they look like, what they’re called, and where they go.
Let’s not waste time, and get right into it! Feel free to skip ahead if you please, as well.
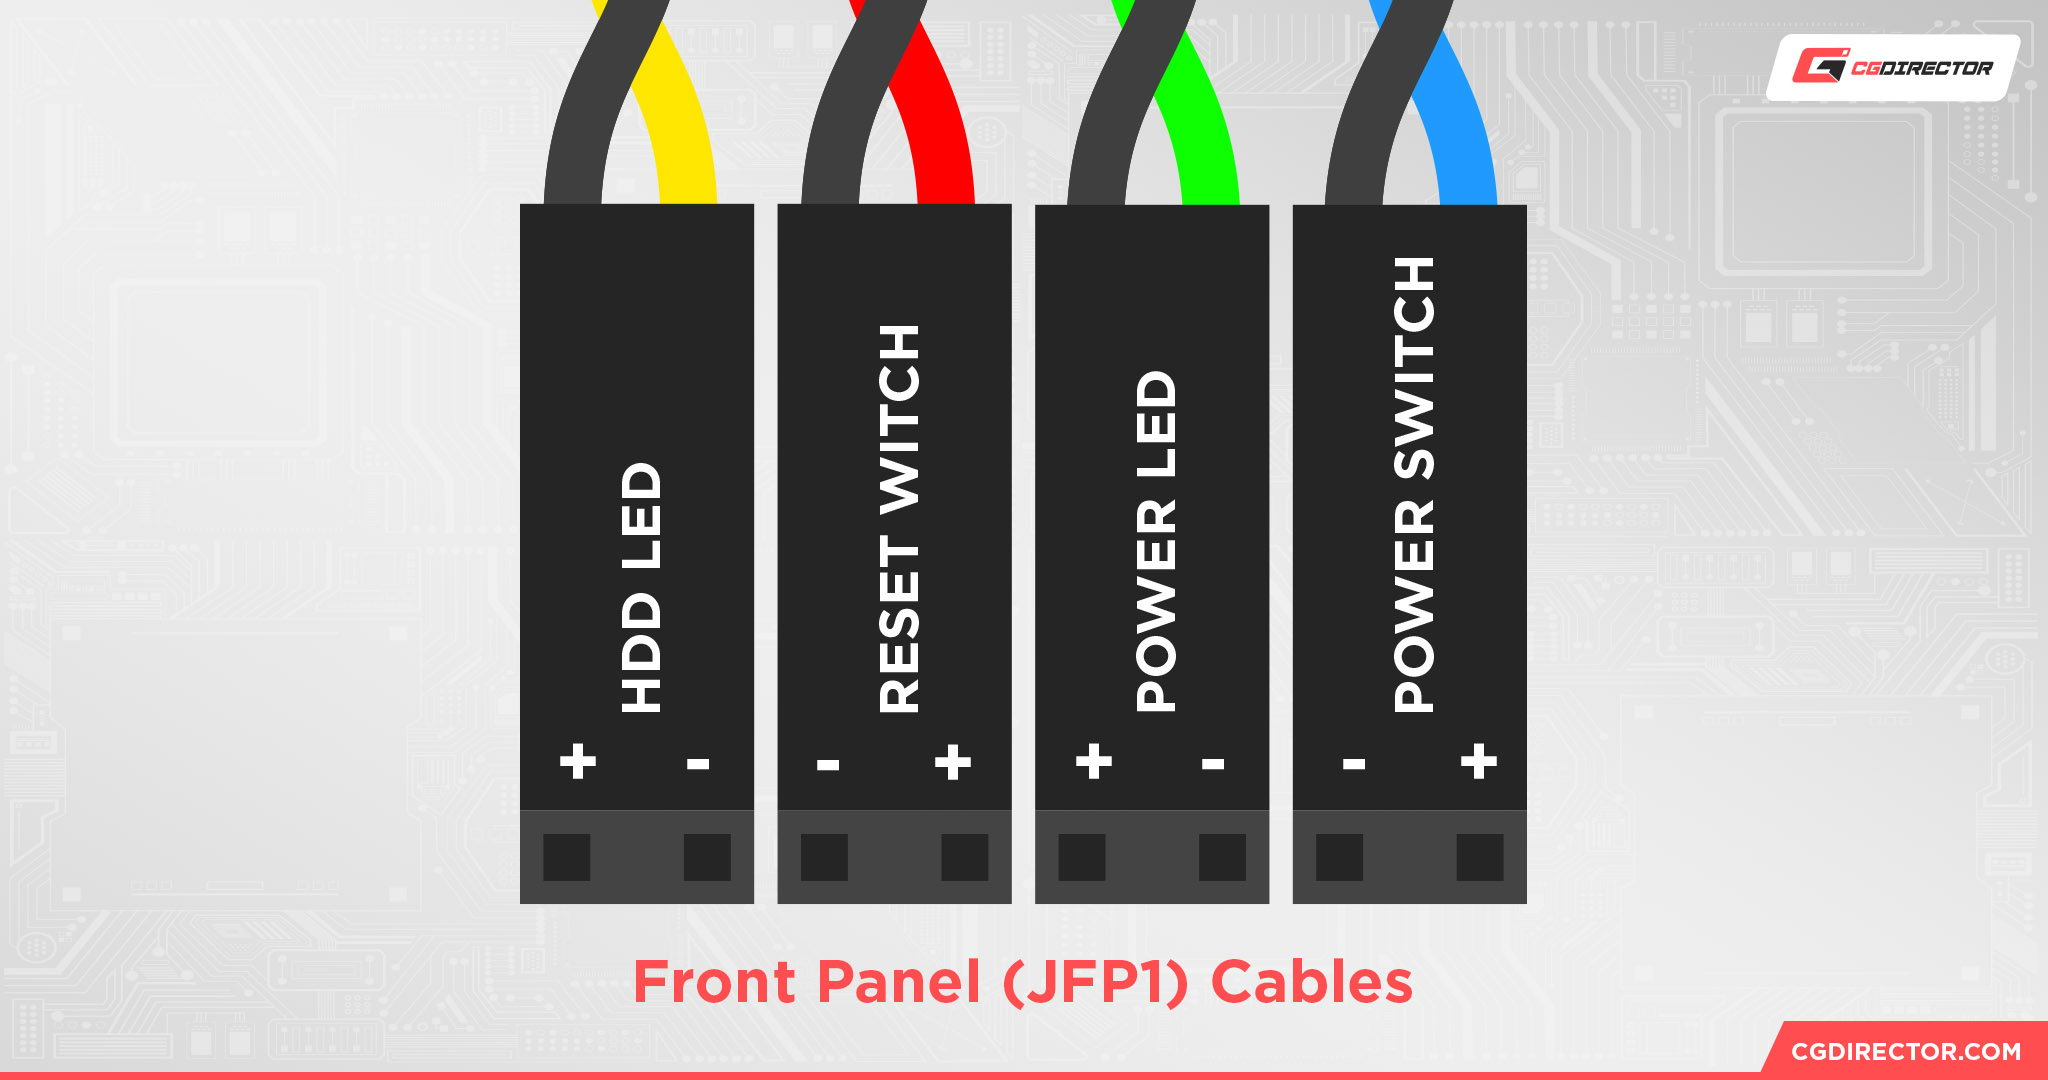
A Brief on Front Panel (JFP1) Cables
First, make sure you can identify your front panel cables. They should look something like the cables pictured above, running from the front panel of your case in order to be connected to the matching JFP1 (Jumper Front Panel 1) header on your motherboard.

These cables are what allow your power button, reset button, and basic status indicator LEDs on your case to function. If you’re lucky, your front panel cables may already be attached together so you can simply insert them into the matching header all at once.
Now, let’s talk about connecting them.
How To Connect Front Panel Cables To Your Motherboard
Step 1: Identify Front Panel Header
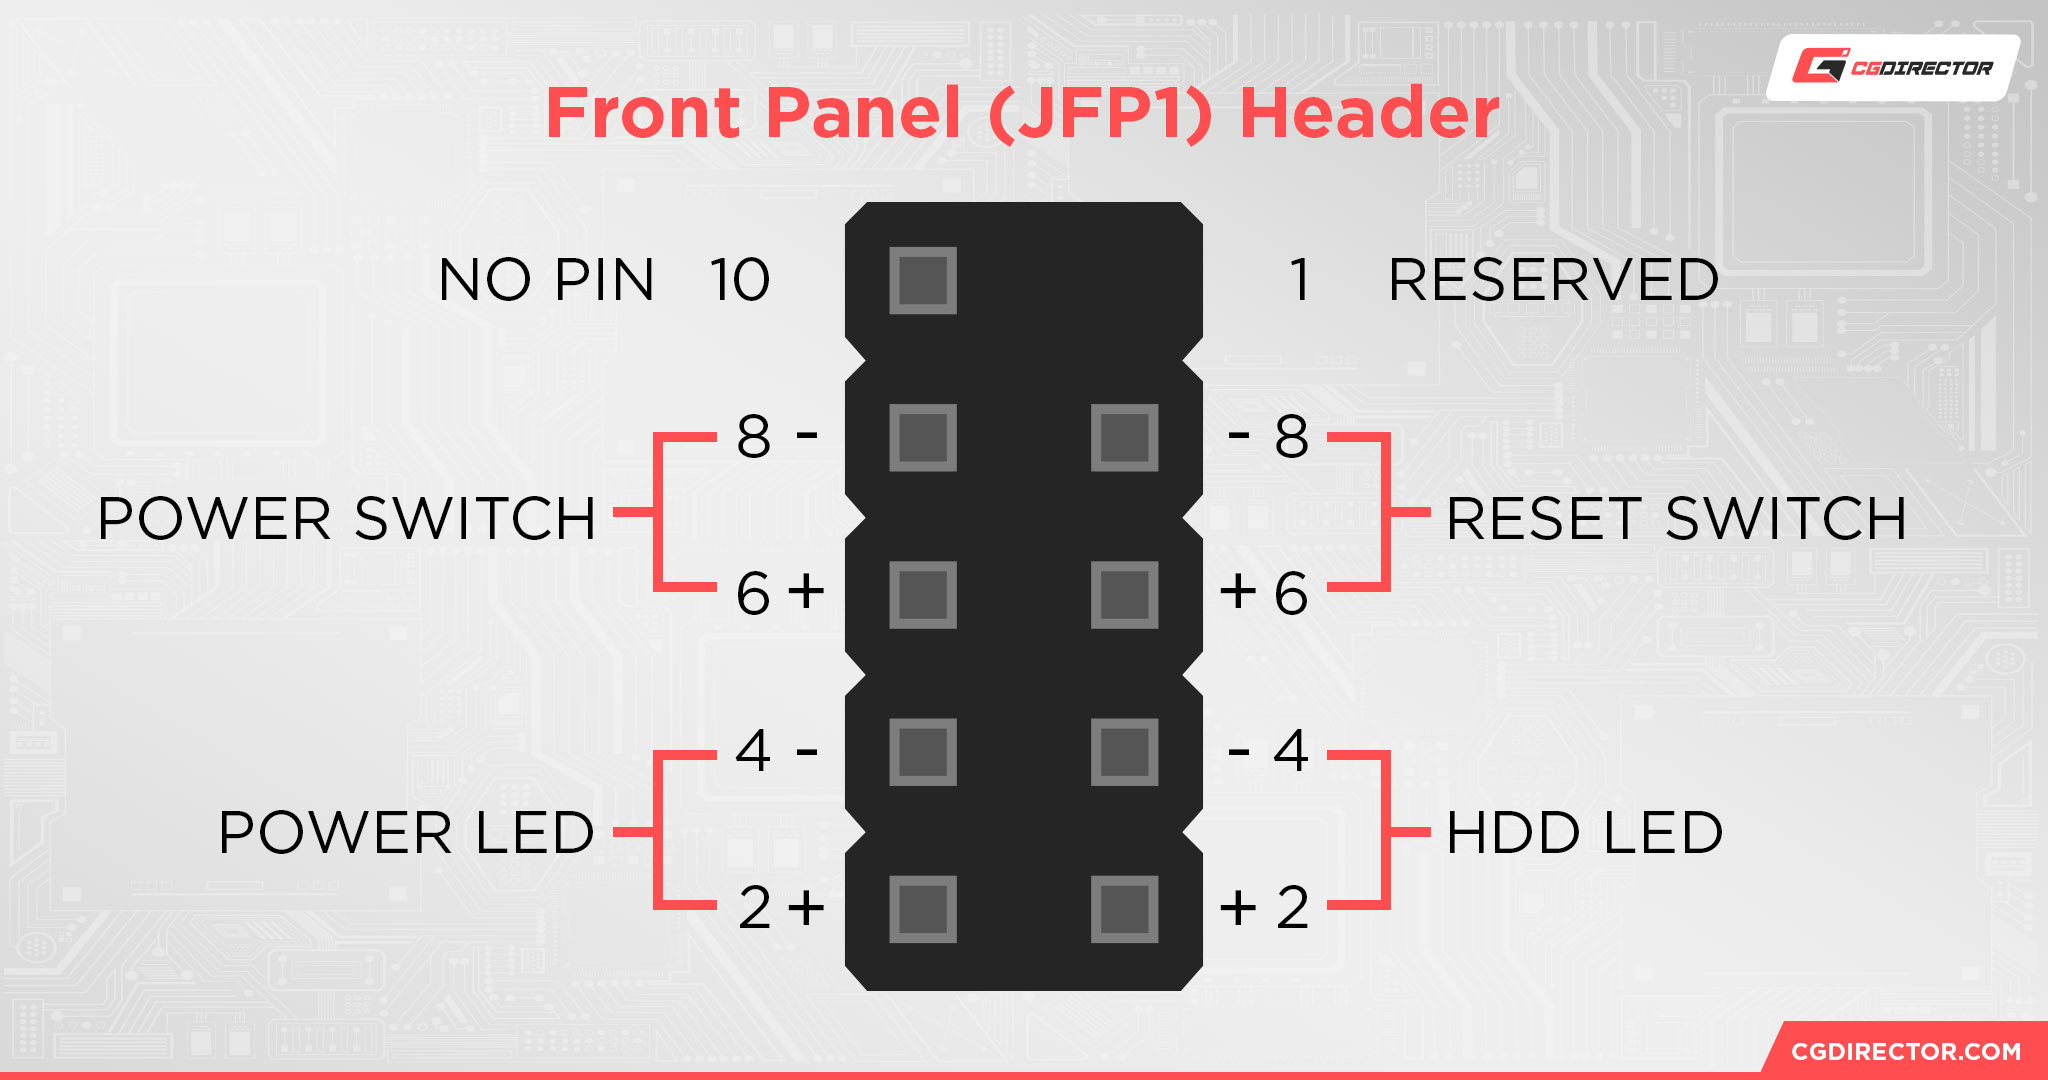
So, what you’re going to be looking for is the JFP1 header on your motherboard.
It should be labeled as such, and look a lot like the graphic illustrating a JFP1 header above. Find this header before you proceed, and get your motherboard manual if you’re having trouble finding it or aren’t sure which way to align your cable(s).
Step 2: Align Your Cables According To Motherboard Instructions
Make sure your Front Panel cables are lined up with the appropriate pins on your motherboard.
If you can’t tell the correct pins from a glance, you may need to consult your motherboard’s instruction manual in order to see how the pins are arranged. It should be like the graphic above, but that isn’t a guarantee.
Step 3: Insert
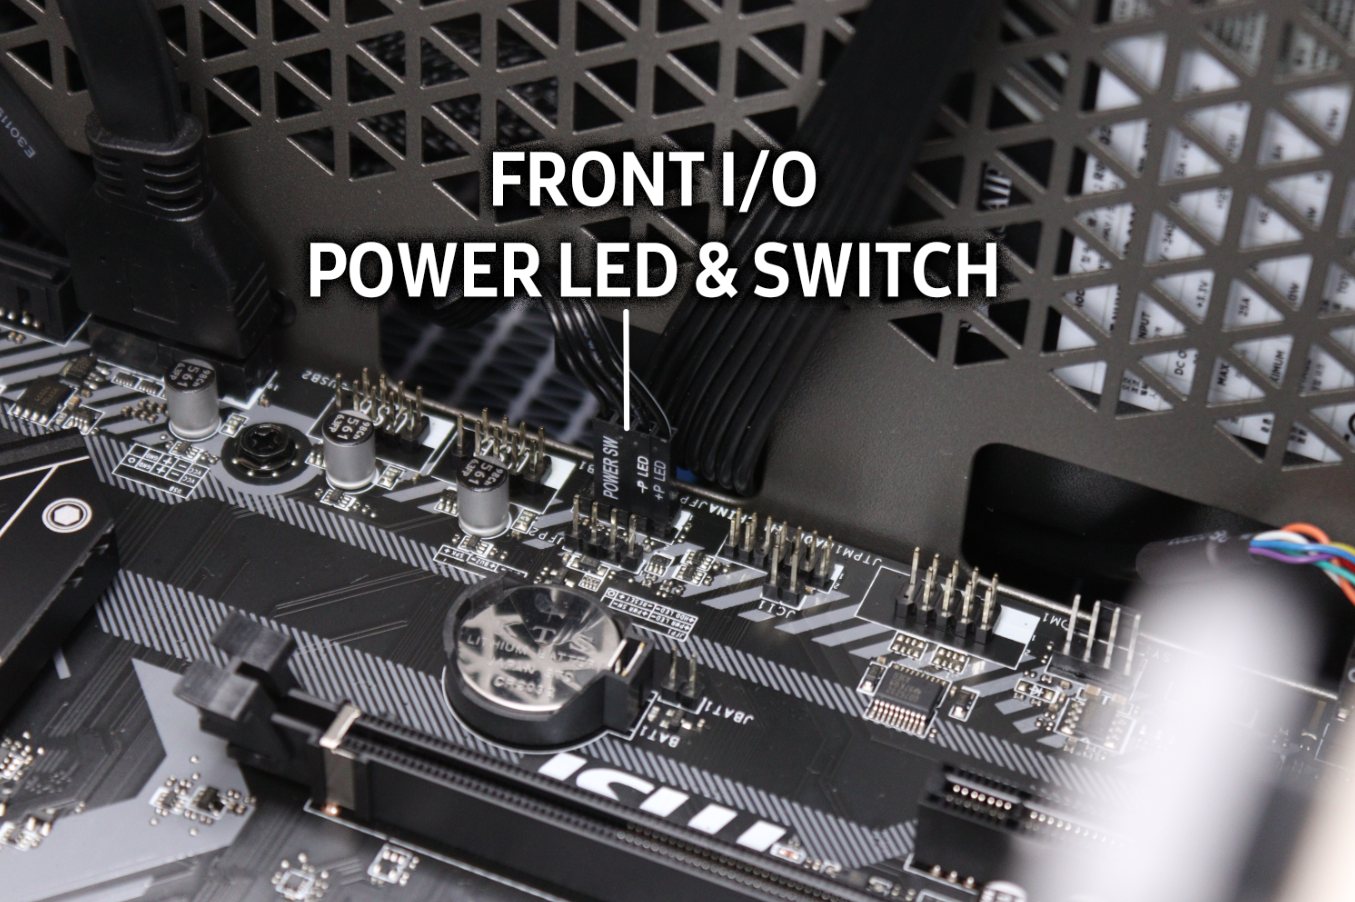
Case Front I/O Power LED & Switch Connectors
Once you’re confident you have the right pins aligned, just place the front panel cables onto the appropriate pins of your JFP1 header. From here, you should be done!
If you have other questions about the JFP1 header and potential motherboard-specific concerns, check out Alex’s JFP1 Guide or comment below for more assistance.
Over to You
And that’s it!
I hope this article helped teach you how to connect front panel cables to your motherboard, and respected your time while doing so. Feel free to leave a comment below if you need more assistance with this or other PC building concerns!
You can also try our Forum for long-form tech discussions with other Experts and Enthusiasts.
Until then or until next time, happy computing! And yes, it would be better if manufacturers would just agree to ship these cables pre-attached and just as ready-to-insert as everything else.
![How To Connect Front Panel Cables To Your Motherboard [Guide]](https://funtechnow.com/wp-content/uploads/thumbs_dir/IRS-to-Let-Some-File-Taxes-for-Free-in-New-qe1uroir0kzeahs0fvbk6ytyq25dzzo6cv2zm0wsho.png)
![How To Connect Front Panel Cables To Your Motherboard [Guide]](https://funtechnow.com/wp-content/uploads/thumbs_dir/Nikon-Z-180-600mm-f56-63-VR-Review-qe1urbd0cwhdryb4kpms825ieny9087xn1y6w5gaws.gif)


