A graphics card is a critical hardware component that handles image and video rendering.
Put simply: it transforms your computer’s internal data into external, colorful pictures you can see, enjoy, and engage with. Without a GPU, you’d be looking at… well, pixelated nothingness.
So, when your PC can’t detect your GPU? It can feel like you’re being thrown straight into darkness with no means to escape.
But don’t worry — today I’ll shine a light on this particular issue and explain exactly how to fix it. In most cases, the fix is something as simple as a quick setting change or updating a driver.
What Is a Graphics Card (GPU)?
Time to get a little technical!
The Graphics Processing Unit, aka the GPU or graphics card, is a component inside your PC that is responsible for calculating visual information and then outputs such graphics to the monitor display.
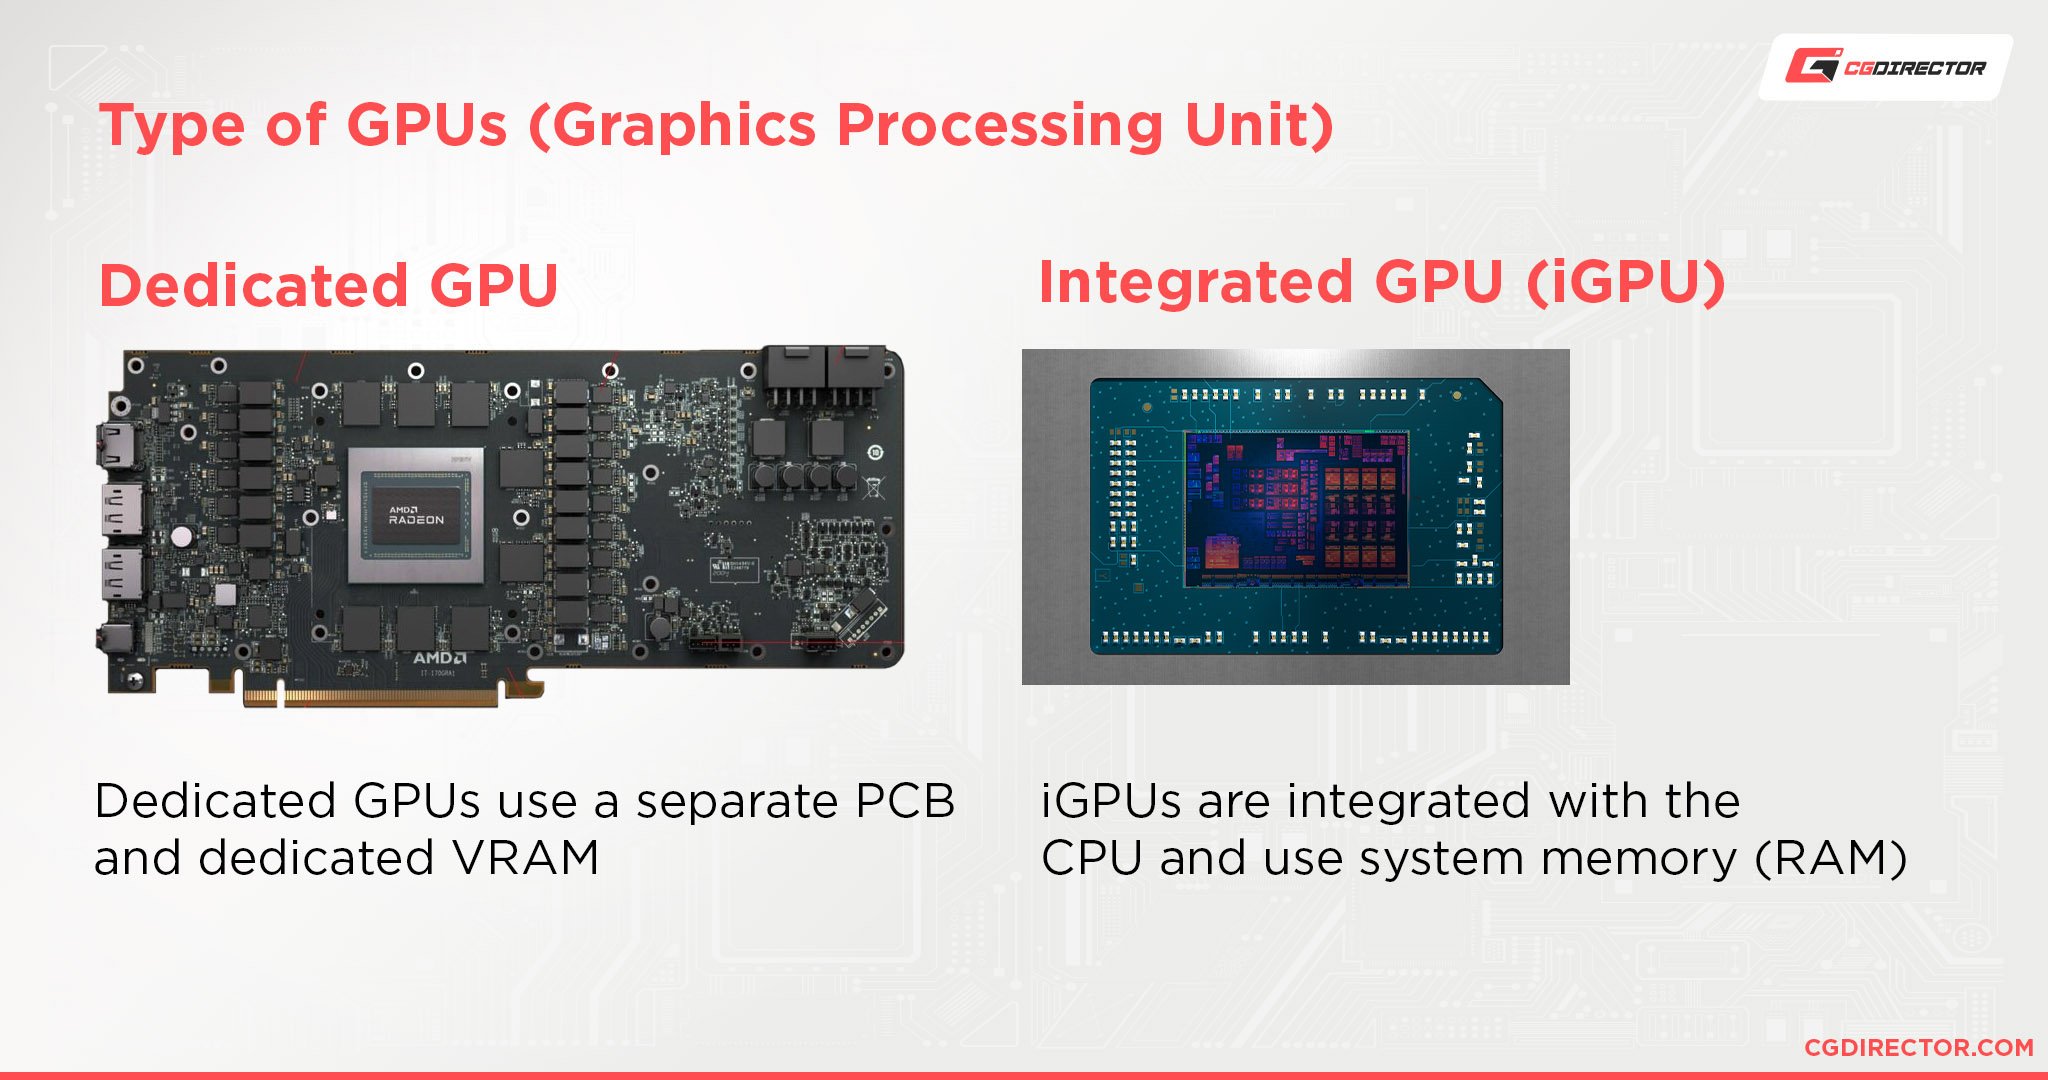
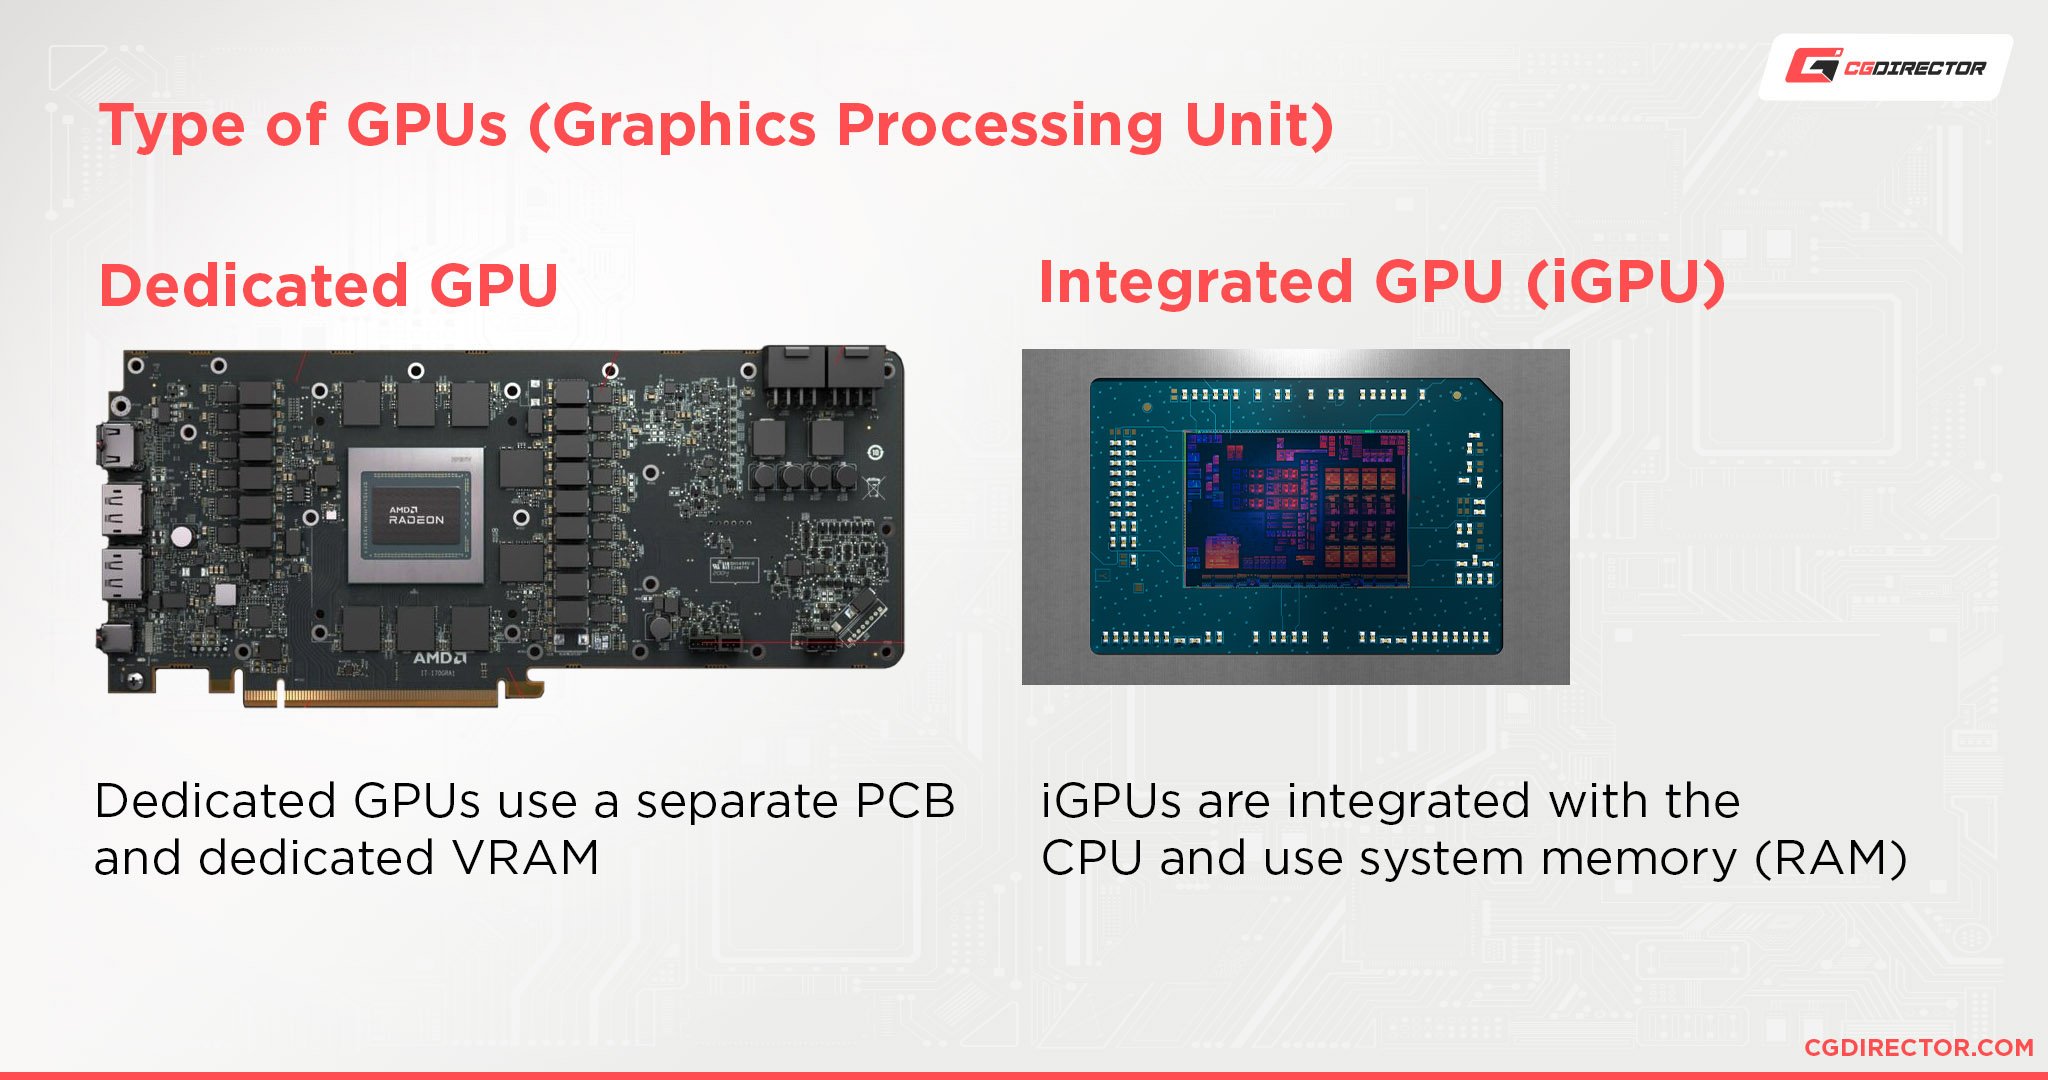
Nowadays, most modern and more powerful computers come with both integrated and dedicated (discrete) GPUs:
- Integrated: Where the GPU is integrated on the CPU chip
- Discrete: Where the GPU is separate from the processor chip and has its own dedicated memory. Discrete GPUs are more powerful than integrated GPUs and are equipped for heavier tasks like editing, rendering, and gaming

Sometimes, your PC can fail to detect your secondary, discrete GPU, preventing you from using your device to its full potential.
It’s also possible for PCs to fail to detect integrated GPUs, though this is a lot more uncommon (but I will be providing troubleshooting steps for that too, so stay tuned).
What Causes a Graphics Card (GPU) Not Detected Error
Some of the most common causes of a GPU not being detected include loose cable connections, poorly configured settings, and out-of-date drivers.
You may also be looking at a hardware fault or compatibility issue, such as a PSU that’s too weak to support the GPU.
I’ll guide you through addressing the common causes above, from the easiest fixes to more advanced troubleshooting steps.
If you get stuck along the way — or would like an expert opinion — make sure to reach out to our team on the forum for assistance. They’ll be more than happy to help!
Graphics Card (GPU) Not Detected: 8+ Troubleshooting Steps
Before I delve further into the troubleshooting process, remember that many of these fixes will require you to have a working integrated GPU.
If your PC only has one GPU and it isn’t being detected, I advise skipping straight to step 4.
With that in mind, let’s get right into it!
1. Check Physical Cable Connections
Yes. I know. It sounds simple — and you’ve probably heard this advice a thousand times before — but there’s a reason why checking your cables should be the first troubleshooting step.
Faulty or improperly connected cables are the leading cause of PC issues and they’re incredibly easy to fix!
You’ll want to check that your GPU power cables are all securely connected to the appropriate slots and that the cables themselves aren’t showing signs of visible wear or damage.
While you’re at it you should also…
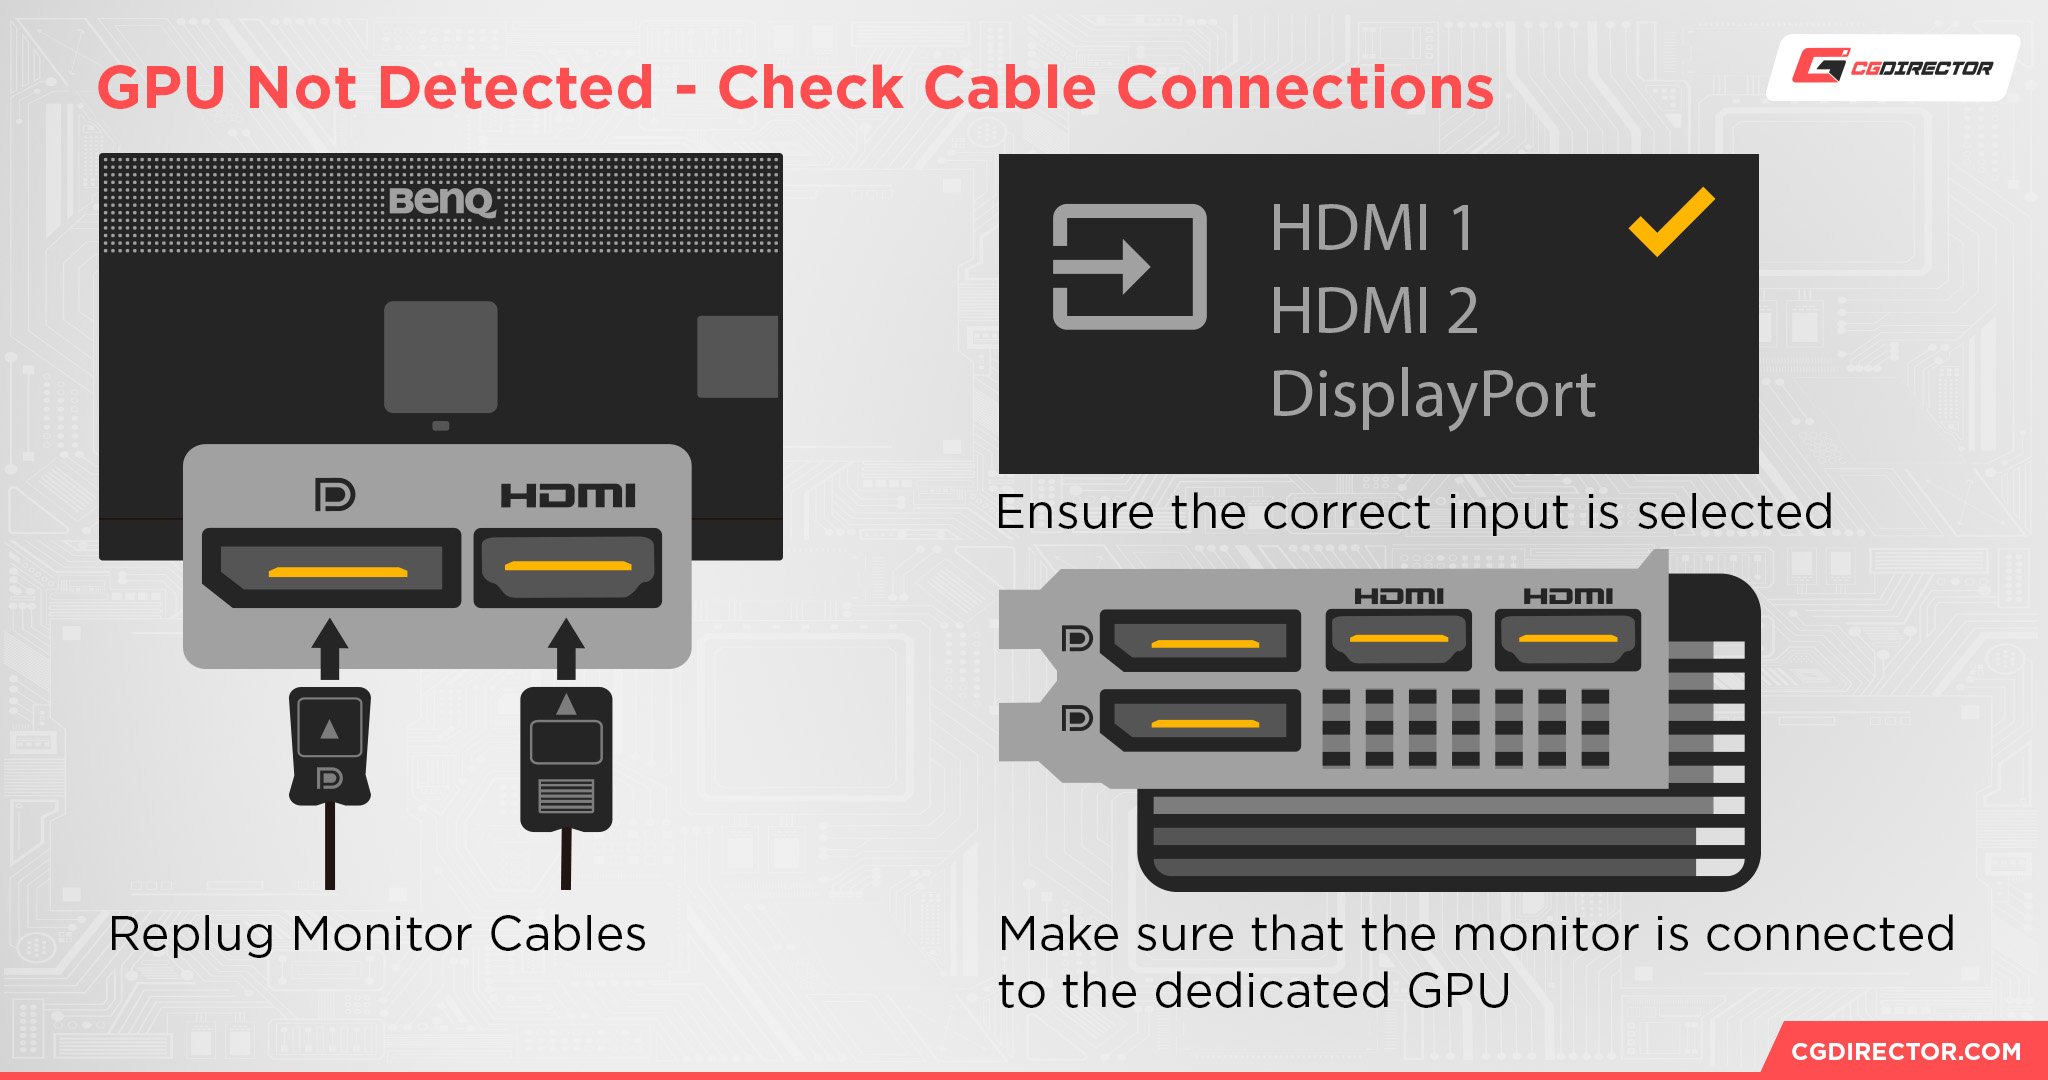
- Replug external monitor cables (HDMI, DisplayPort, DVI, or VGA)
- Ensure the monitor is connected to the dedicated graphics card and NOT the motherboard
- Check that the monitor is set to the correct input (i.e. check that the monitor isn’t set to HDMI 1 if you’re plugged into HDMI 2). Most monitors will auto-detect the appropriate input, though this isn’t always the case

Any cables showing signs of damage will need to be replaced. If everything checks out — and you’ve replugged all cables securely — restart your PC and see if the issue still persists.
If your computer still can’t detect your GPU, it’s worth swapping out the cables one by one if you have spares on hand; not all cable damage is visible to the naked eye!
2. Check if the Graphics Card Is Enabled in Device Manager
If all your cables are in working order? Your next best bet is to check if the graphics card is actually enabled.
It’s possible that your PC has automatically swapped to the integrated GPU and disabled your discrete GPU to preserve battery life. This is especially the case if you have a power-saving mode activated.
Even if you’re not low on power currently, an error may have caused your PC to get stuck on this setting. You may have also disabled the GPU yourself by accident without realizing (or perhaps your feline’s paws did…).
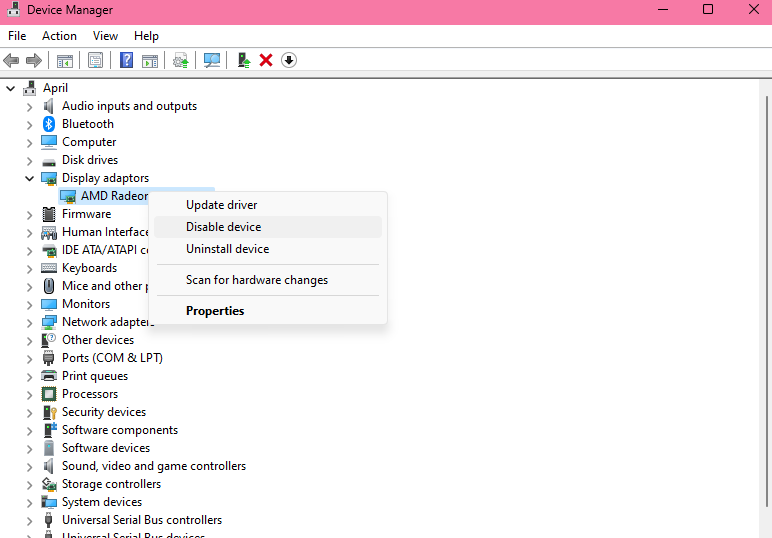
The easiest way to check if your dedicated GPU is enabled is through Device Manager:
- Open the Start Menu and type “Device Manager” in the search bar
- Click on Device Manager when it appears
- Find “Display Adapters” and click on it to expand the list
- If your discrete GPU appears, right-click on it. If it’s disabled an option to “Enable Device” will show up (if the GPU isn’t listed skip to troubleshooting step 4)
- Click on “Enable Device”
- Follow the necessary steps and then restart your PC
- Check if the issue is now solved

If you’re still experiencing problems, you’ll likely need to update or reinstall the graphics card driver.
3. Update, Reinstall, or Roll Back Graphics Card Driver
An out-of-date or corrupted graphics driver is going to hinder your GPU’s performance.
At “best,” you’ll experience performance problems such as stuttering, slowdowns, and random freezes. At worst? Your computer won’t detect your GPU at all.
So, you’ll definitely want to reinstall or update your current graphics card driver to see if it solves the issue.
Let’s try updating the driver first:
- Open up Device Manager again
- Select “Display Adapters”
- Right-click on the GPU driver
- Select the “Update Driver” option and then choose “search automatically for drivers”
- Follow the steps provided on the screen and restart your PC once the process is finished
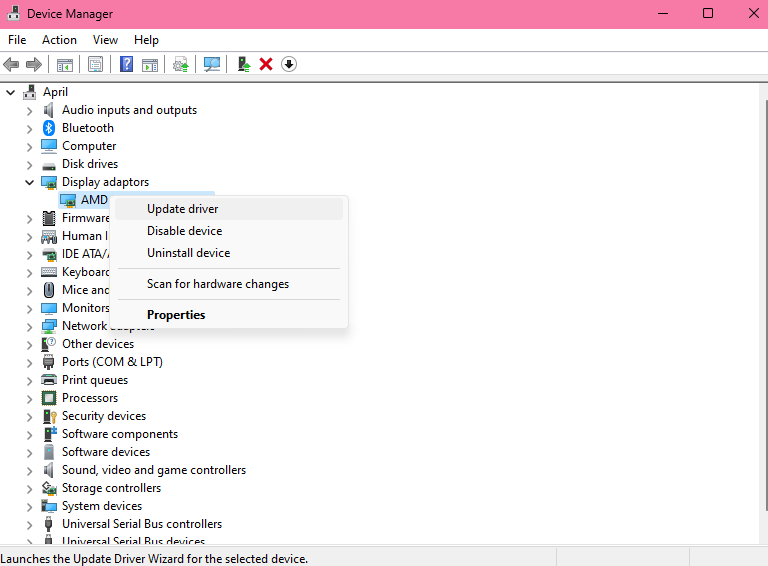

If this doesn’t work, you’ll next want to try a clean reinstall. I’ll cover how to go about this below but do keep in mind you’ll need to be familiar with your specific graphics card model.
In Device Manager, right-click on the GPU driver and select “Uninstall Device” to begin the uninstallation process.
Confirm you would like to uninstall the driver, making sure to check the “Delete the driver software for this device” box. You can also use third-party software like Display Driver Uninstall (DDU) to uninstall old drivers.
Once uninstalled, reinstall the latest driver version from the manufacturer’s website (AMD, Nvidia, or Intel Support). You will need to search for your specific GPU model to get the relevant driver files.
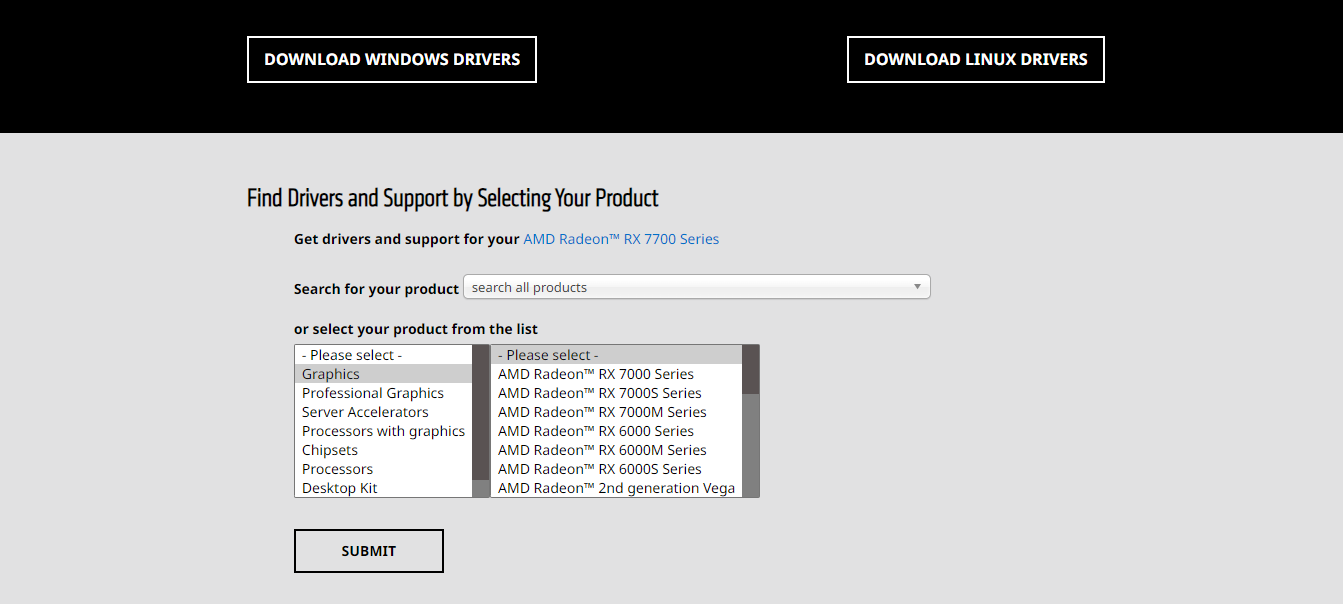

Check if the issue persists. If it does, try rolling back to an older driver version — the latest update might have a compatibility issue with your other hardware components.
If you can’t access your GPU through the Device Manager, or you’re still experiencing issues despite reinstalling a different driver version, you’ll next need to enter the BIOS menu.
This can seem a little daunting if you’re not familiar with hardware, but it should be completely safe as long as you’re careful and don’t stray from the steps I’ve outlined below.
4. Reset BIOS Settings to Default
Improperly configured BIOS settings can lead to compatibility issues and prevent your GPU from being detected properly.
It’s definitely worth resetting your BIOS back to its default settings, especially if you have adjusted the settings in the past (whether out of curiosity or due to overclocking or undervolting).
Here’s how to enter and reset the BIOS:
- Switch off your computer and wait a few minutes
- Turn your PC on and immediately hold down the F2 or Del key (depending on your manufacturer) until you get an “Entering Setup” message
- Select the “Reset BIOS to factory defaults” option in the BIOS menu. Its exact location and name may vary depending on your computer, but it will typically be called “Load factory defaults.” Pressing the F9 key or Alt + F keys together in most cases will also bring up this setting option
- Save the changes and exit. The computer should now restart with the BIOS back to default settings
If you’re unable to access the actual BIOS menu, there are a few other methods you can use to reset the BIOS, such as the clear CMOS button, reseating the battery, or using a jumper.
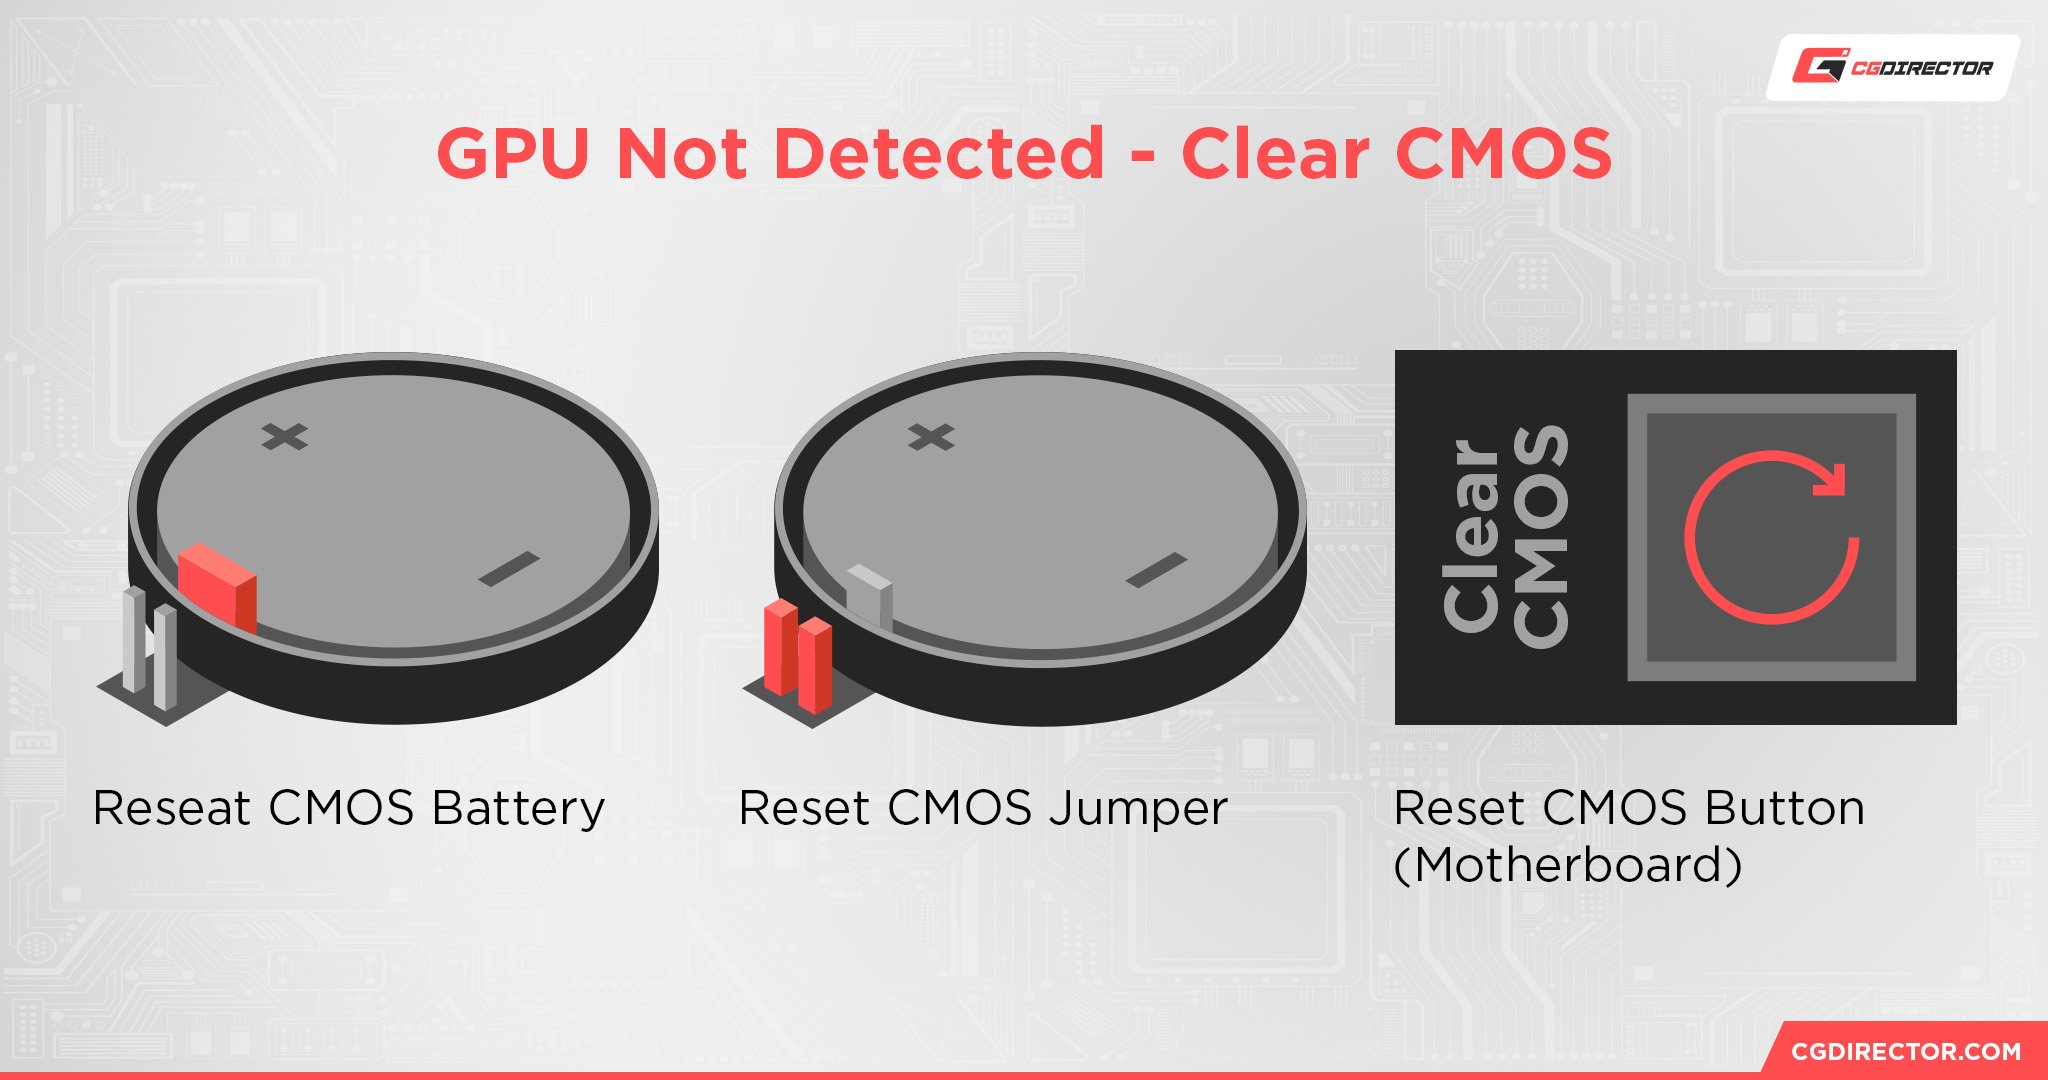

I cover all these alternative methods in this in-depth guide.
Hopefully, your GPU is now being detected and your stressful evening ends here! Relax, take a breather, and get back to streaming your favorite Netflix series.
But if your computer still isn’t detecting your GPU? Don’t give up hope just yet — there are a few more troubleshooting steps you can try.
5. Update the BIOS
Updating the BIOS is more complicated than a reset and it can be pretty risky. If you’re uncomfortable around hardware, I advise you to seek expert assistance from here on out.
For those that are hardware-savvy though, you’ll definitely want to try updating the BIOS, especially if your motherboard is older than the GPU. Your current BIOS version may not support your graphics card, leading to the detection issue.
You’ll first want to double-check what BIOS version you’re currently running.
The easiest way to do this is via the BIOS menu. The BIOS version will typically be displayed on the main page or under a tab such as “Main” or “System Information.”
It may also be referred to as “Firmware Version.” You will then need to compare your BIOS version with the latest version available for your motherboard.
The process for updating the BIOS ultimately depends on your motherboard manufacturer.
It will generally involve visiting the manufacturer’s website, downloading the appropriate BIOS update file for your motherboard model, and then transferring this to a specially formatted USB flash drive.
The BIOS update itself usually takes around 3 to 10 minutes to complete.
Sadly, I can’t cover the full, step-by-step process here, but I have curated a detailed guide that walks you through everything. You can also contact your manufacturer for assistance.
I know that updating the BIOS is pretty time-consuming, but it’s worth it — many PC users experiencing a GPU detection issue reported that updating the BIOS fixed the problem, and I believe if nothing else has worked it’ll likely help you as well!
If updating the BIOS doesn’t solve the issue, you’ll want to take a look at your PSU.
6. Check for Power Supply Compatibility
Your power supply is responsible for keeping your whole system afloat.
If it isn’t powerful enough to support your GPU? You’ll no doubt experience performance issues, and in some cases, your PC won’t detect your GPU at all!
The easiest way to determine whether your power supply is powerful enough is to check your GPU’s manual. It should specify the minimum power voltage needed for the GPU to run smoothly.
You can also find this information on the manufacturer’s website.
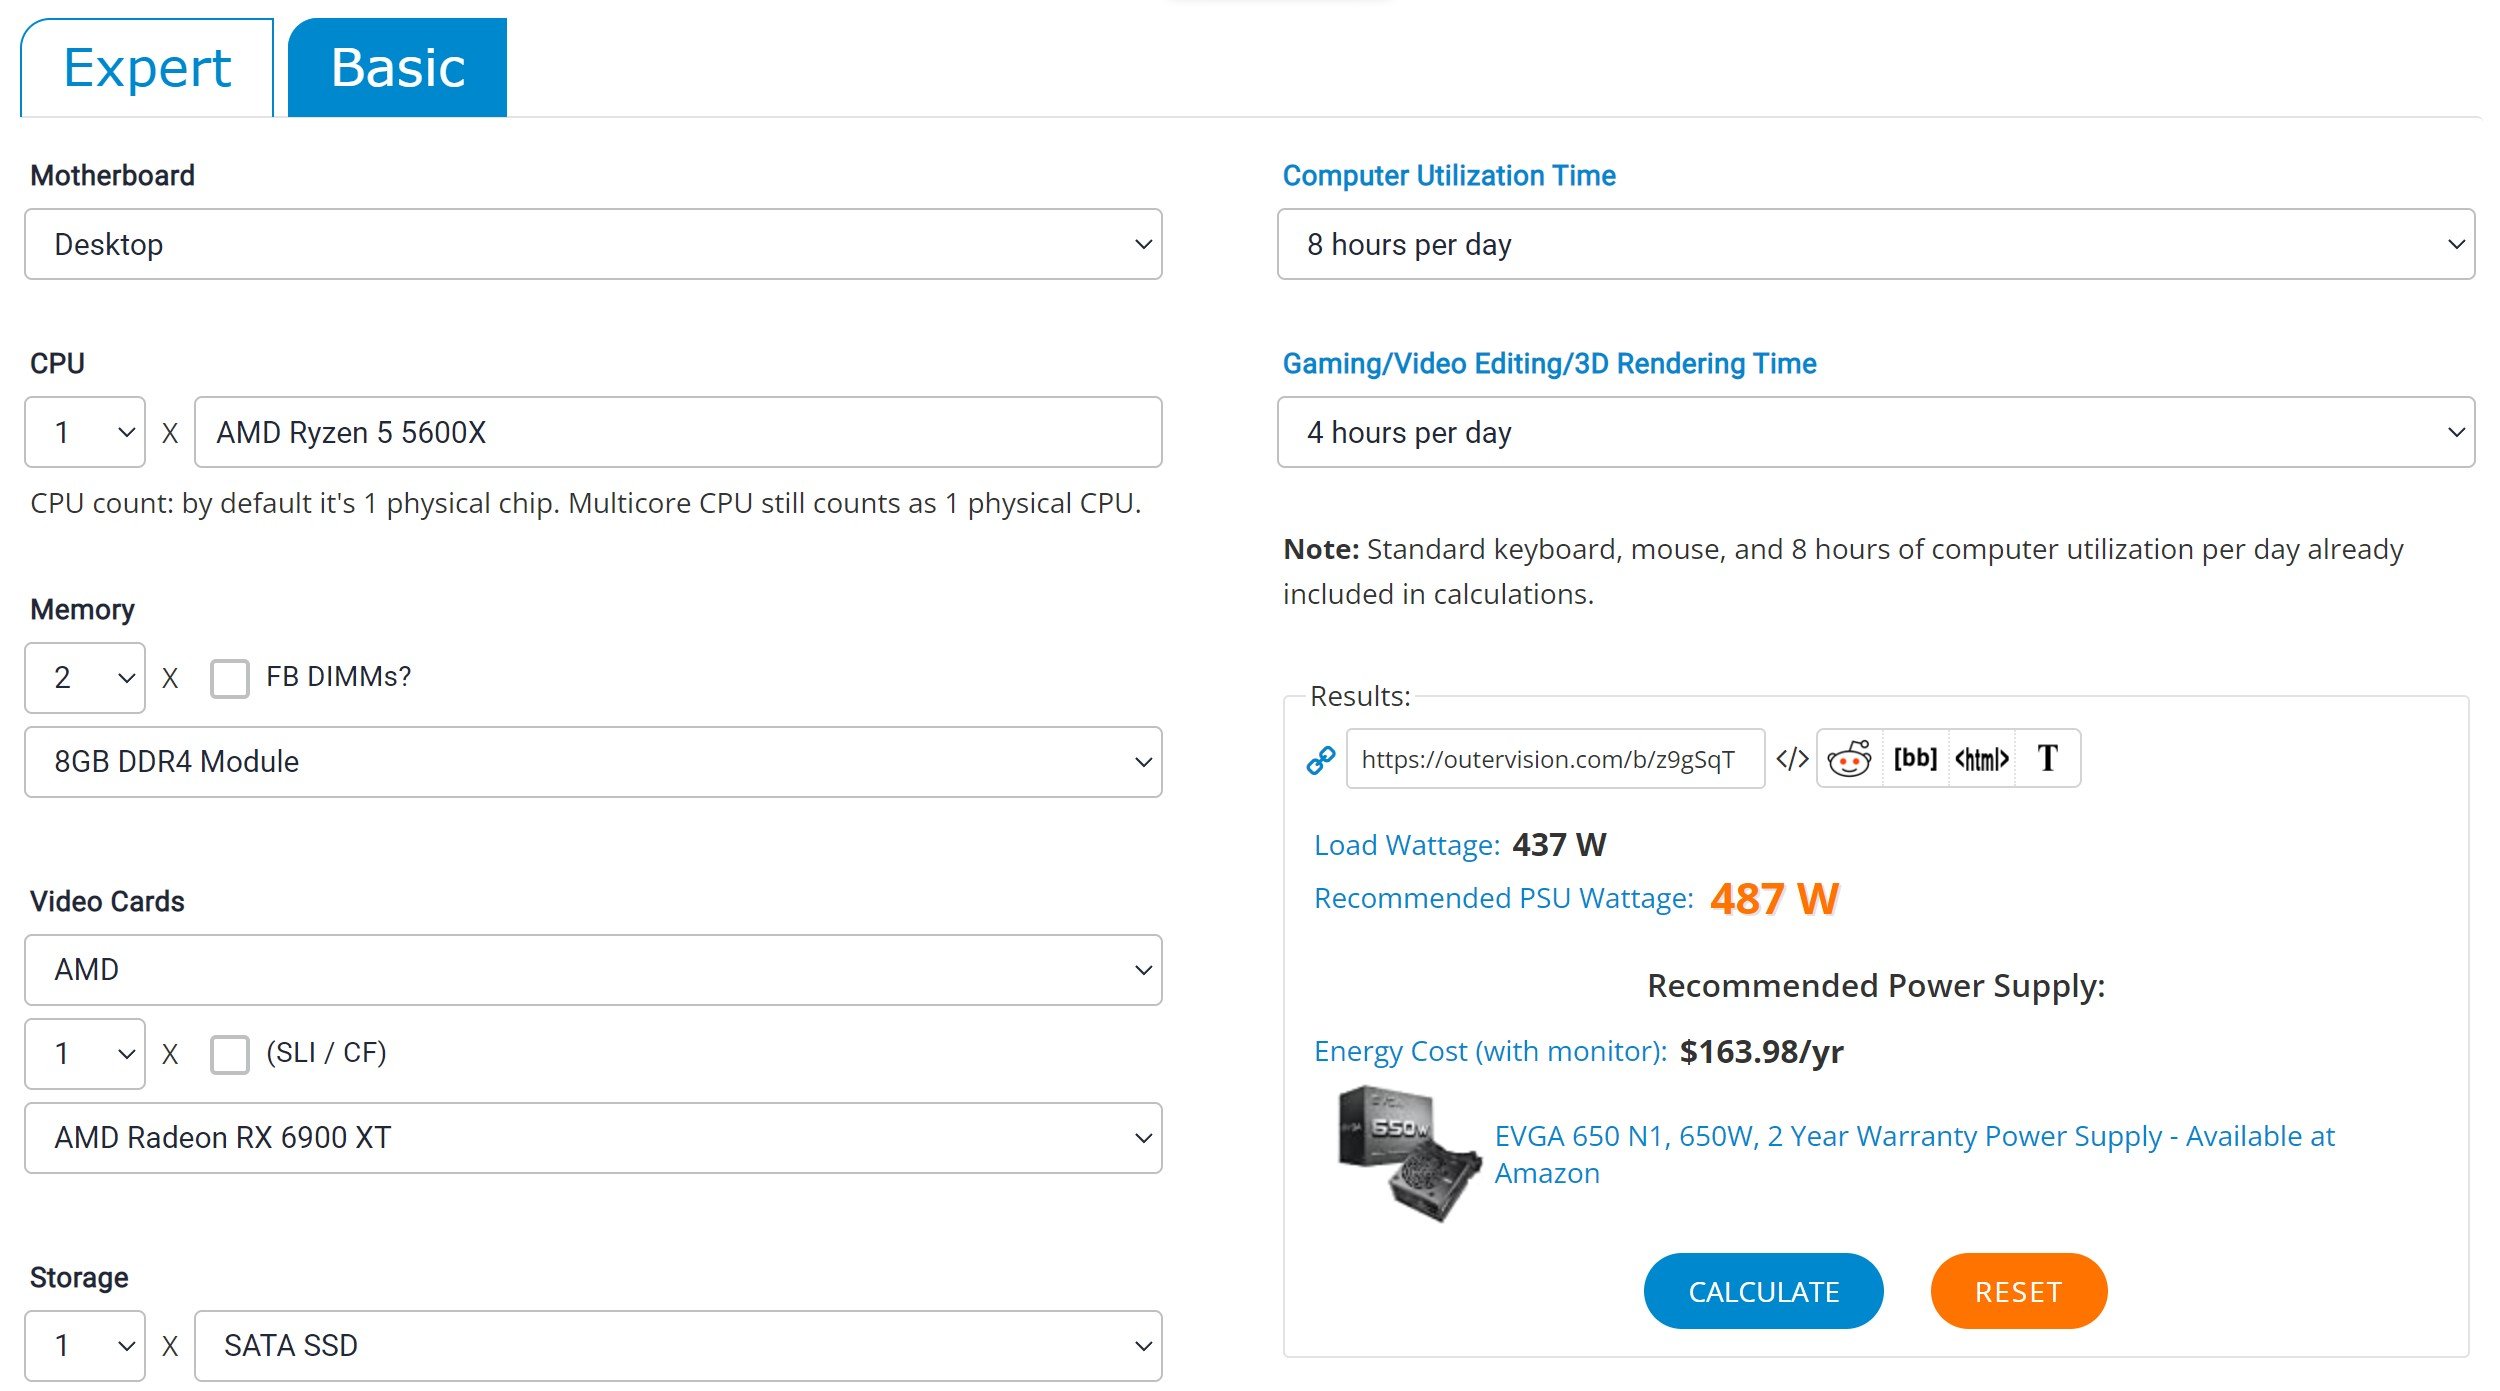
For example, if you’re running an AMD 6650 XT you would go to AMD’s website, enter your GPU model in the search bar, and navigate to the product specification page. In this case, the minimum PSU recommendation is listed as 500 W.
As an extra measure, use a PSU calculator to find a wattage estimate that takes into account your other hardware components.
If you find that your current PSU is below the recommended power output, you’ll need to replace it with one that meets (or is higher) than the minimum recommendation.
7. Troubleshoot the GPU
Right. If none of the steps above have worked, all that’s left is to troubleshoot the GPU itself.
It’s possible that you have a clogged-up PCI Express slot or the GPU isn’t properly seated. Worst case scenario? Your GPU might be damaged in some way.
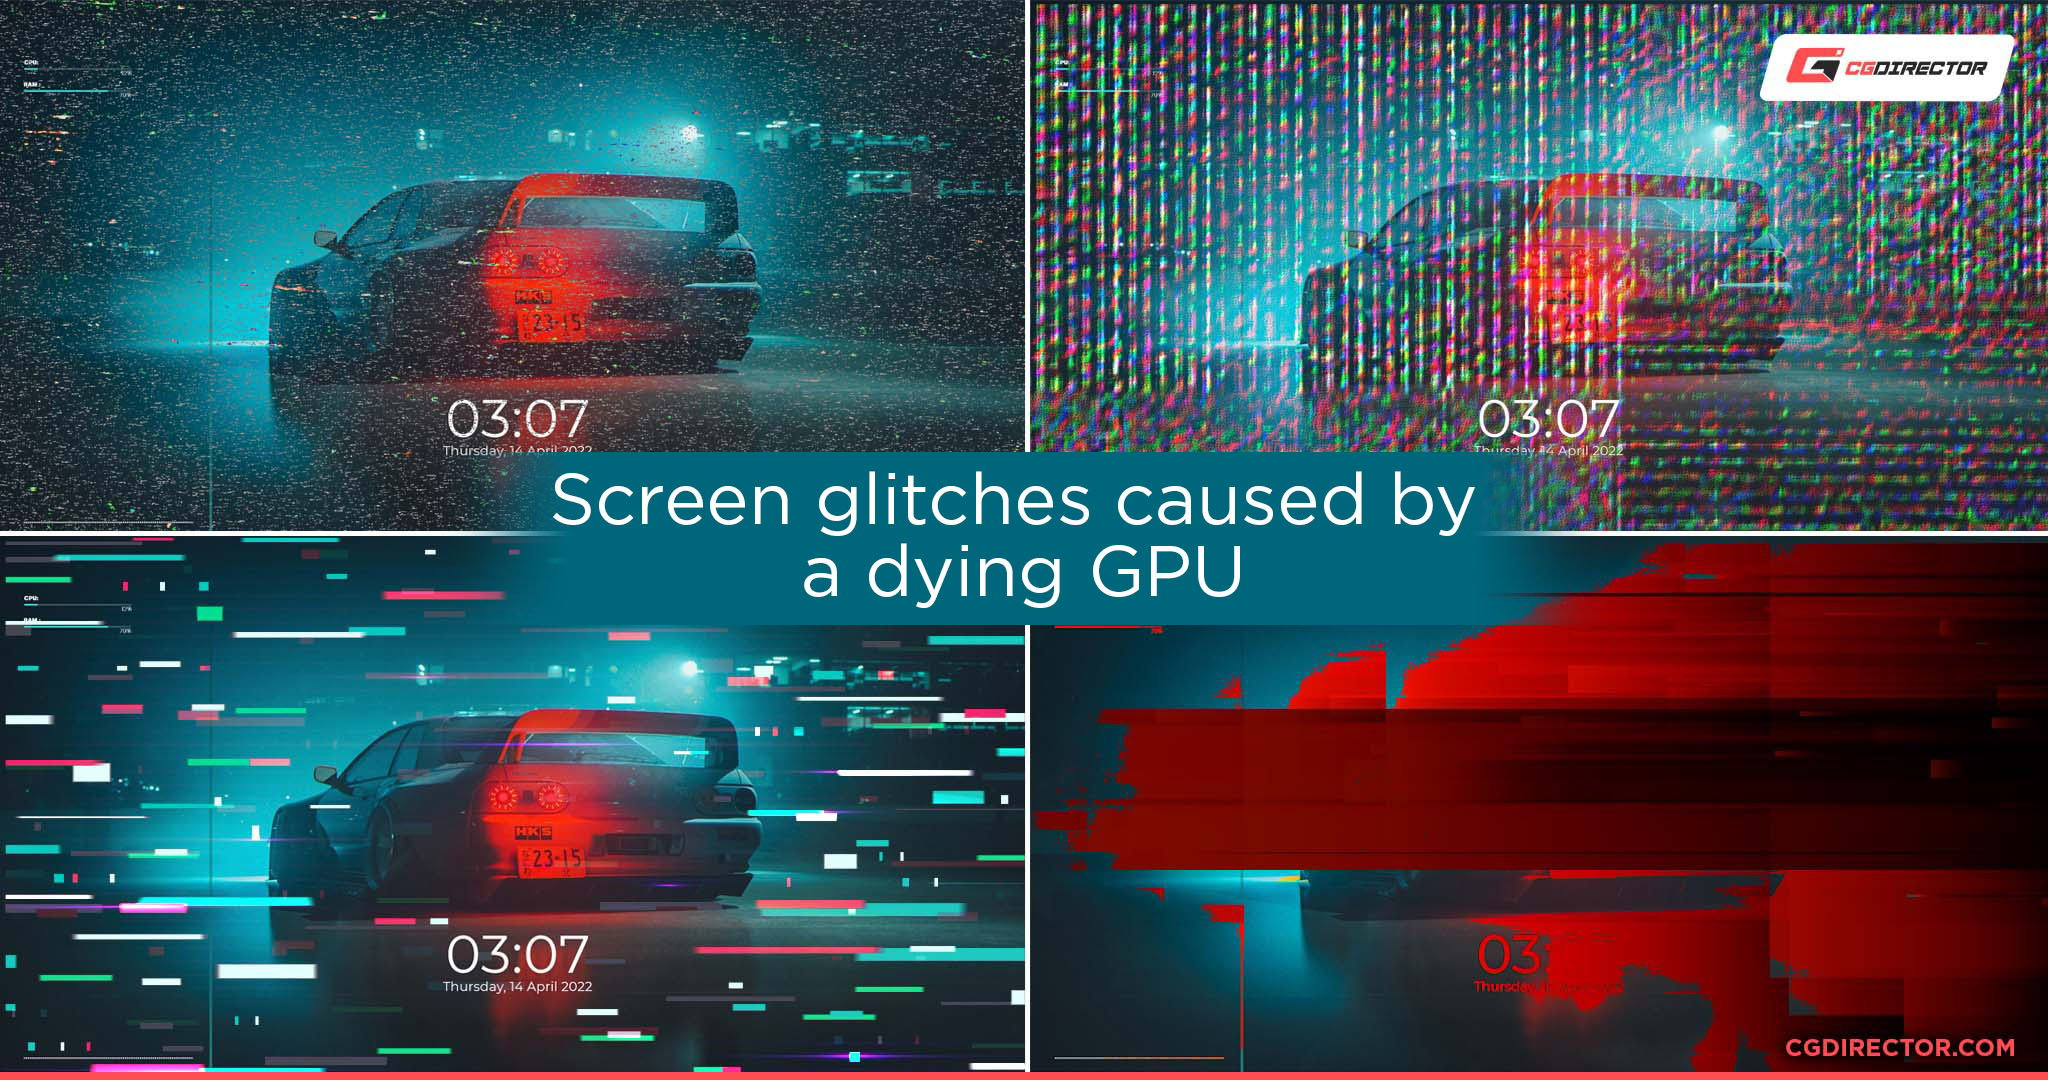

I’ll guide you through the troubleshooting steps below:
- Switch everything off and open up your PC on a clean, static-free surface
- Check for excessive dust buildup (clean with a microfiber cloth and compressed air if necessary)
- Ensure any GPU cables are properly connected to the appropriate slots. Check for cable issues such as kinks, tears, and bends
- Remove and reinstall the GPU. While reinstalling the GPU, inspect for grime and visible damage such as bulging capacitors, missing screws, or rusted ports. You should also check the PCIe slot itself for signs of damage or dust with a flashlight
- Make sure to connect the GPU to the PCIe x16 slot closest to your CPU
- Restart your PC and see if the issue is now solved
- If it isn’t, repeat the process but try connecting to another x16 slot if you have one available (you likely have a faulty slot if the other slot works)
If the graphics card still isn’t detected, swap out your GPU for another one if you have a spare.
If your PC detects this it’s a pretty clear indicator your current GPU is faulty or incompatible with your system. You’ll need to send it in for repairs or replace it — I’m sorry to break the bad news.
8. Other Possible Fixes for Graphics Card (GPU) Not Detected
There are a few other possible fixes that you can try as a last resort.
These fixes aren’t exactly common and only really apply in specific situations, but hey, they’re still worth a try!
- Check for conflicting programs. Programs running in the background that alter your display properties may be preventing your computer from detecting your GPU. Make sure to close any potentially problematic apps and see if it fixes the issue. Restart your PC once you have closed these programs.
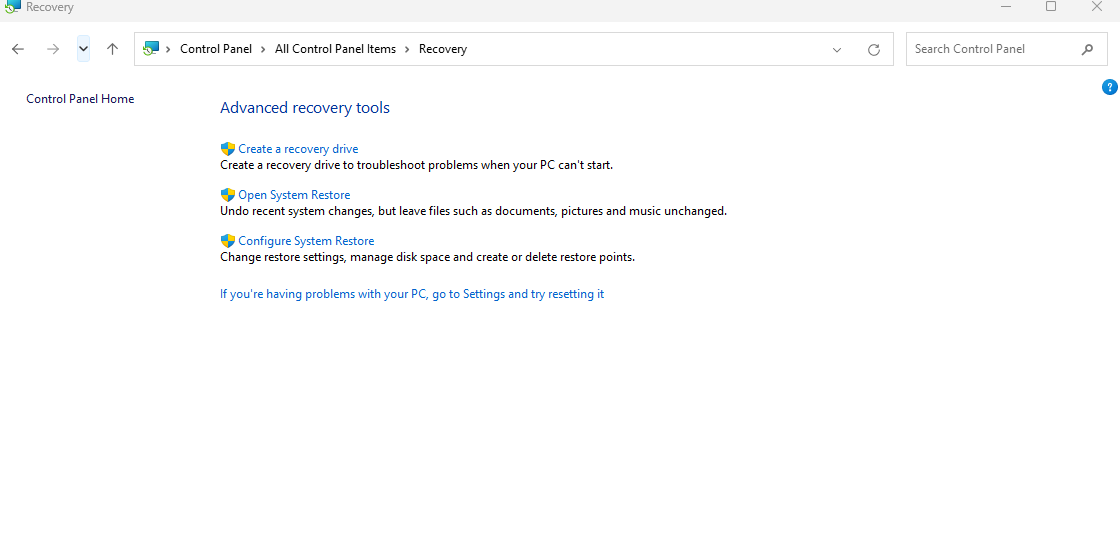
- Roll back Windows update. This is especially worth trying if you only started experiencing GPU issues after a Windows update. Navigate to “Control Panel,” “Recovery,” “System Restore,” and then follow the steps outlined.

FAQ
How do I know if my GPU is dying or damaged?
Tell-tale signs of a damaged or dying GPU include screen flickering, graphical glitches (artifacts), stuttering, and sudden crashes.
Another common sign is excessive heat whenever you try to do graphics-intensive tasks.
What causes a GPU to fail?
Many things can cause a GPU to fail, including improper installation, faulty manufacturing, static overload, and bad capacitors.
However, the most common cause by far is excessive heat — our team provides plenty of heat management tips in this guide.
How many years does a GPU last?
A GPU will typically last for up to 8 years with normal wear and tear, though the exact lifespan can vary depending on factors like heat management and overclocking.
A GPU’s natural lifespan — i.e. its death isn’t a result of poor care — isn’t a huge cause for concern.
After all, you’ll generally be looking to upgrade your GPU every few years anyway to keep up with increasing software demands.
Over to You
Hopefully, my guide has helped solve this nerve-wracking issue and allowed you to enjoy your GPU in its full, glorious form once again.
While an undetected graphics card can be downright traumatizing, in most cases the underlying cause is a quick fix, like updating your drivers.
But if you’re still experiencing issues? Leave a comment below or head on over to our forum for advice tailored to your GPU model and symptoms.


![Graphics Card (GPU) Not Detected [How to Fix]](https://funtechnow.com/wp-content/uploads/thumbs_dir/This-Adobe-and-Christian-Cowan-collaboration-feels-like-photoshopping-clothes-qjqrrcxn9yl8da3jd6sxvdnzwj5g0htpemmkg14wu4.jpg)
![Graphics Card (GPU) Not Detected [How to Fix]](https://funtechnow.com/wp-content/uploads/thumbs_dir/Blackmagic-Releases-Another-Hefty-Davinci-Resolve-Update-qfgj39tyzrx156be407rngl1wlil2m7w8v2exd20jg.webp)


