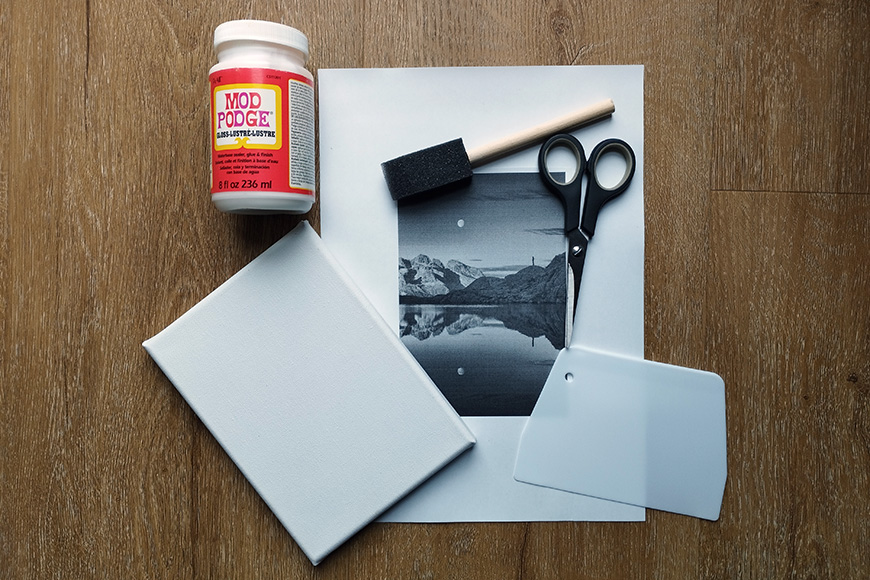
Did you know that you can transfer your photos onto canvas at home?
Having your photos printed on canvas can be expensive. However, if you like to DIY, you can easily do it yourself.
In this tutorial, you’ll find the steps to transfer a photo to canvas easily and spending only a few dollars.
So, if you’re ready to create your own wall art with your digital photos, let’s get started!
More fun DIY photo projects:
Materials

- Photo printed using a laser printer
- Canvas
- Mod Podge
- Foam brush
- Plastic card
- Water
- Plastic cover (optional)
Process
I used a black-and-white photo. However, following the same steps, you can transfer a color photograph or any type of graphic.
Step 1


First, choose the image you want to use and resize it to fit the size of your canvas. You can use any photo editor for this or even online resources. I’m using Photoshop.
Step 2


Next, mirror your photograph. In Photoshop, you need to select the entire canvas using the keyword shortcut Cmd (Mac) or Ctrl (Windows) + A.
Then, go to the menu Edit > Transform > Flip Horizontal. This step is especially important if the image has text on it.
Step 3
Print your photo using a laser printer. This is important because this technique won’t work with photos printed using an inkjet printer.
You should also use regular printing paper – don’t use photo paper.
Step 4


If the paper size is different from the print size (like mine is), cut it to size. You don’t have to be super precise, so don’t worry.
Step 5


Now, cover your working area with some plastic to avoid making a mess if some of the Mod Podge spills out. A simple garbage bag will do. This is, of course, optional but highly advised.
Once you’ve done that, you can cover the canvas with Mod Podge. I find that using a foam brush is the easiest, but you can use a regular brush if you prefer.
Step 6


Next, place the photo on the canvas while the Mod Podge is wet. The printed side needs to be in contact with the canvas – that’s why you need to mirror the image before printing.
Using a plastic card, remove all the air bubbles and the excess Mod Podge. You can use a piece of paper or plastic on top to avoid the mess.
Your photo will look white at this point, so you might think there’s something wrong, but there isn’t. This is how it’s supposed to look.
Step 7
Let the piece dry overnight for approximately 12 hours.
Step 8


Once the Mod Podge is dry, dampen your foam brush and start passing it on top of the print. As it gets wet, you’ll start to see your photo and the paper will start to peel.
Step 9


Keep on rubbing to peel off all the paper. You have to be gentle, though – otherwise, you’ll peel the print as well.
Step 10


When you feel you’re done removing the paper, let the canvas dry. As it dries, you might notice that not all the paper was removed properly.
How Much Do You REALLY Know About Photography?! 🤔
Test your photography knowledge with this quick quiz!
See how much you really know about photography…


If this is the case, repeat steps eight and nine. Believe me; it’s better to do this a few times and carefully remove the paper than to try to do it all at once and risk peeling the photo as well – it happened to me on my first try.
A friend of mine suggested using spray acrylic sealing before doing the transfer so that the transfer isn’t as delicate and you don’t risk peeling it off.
I didn’t need it; it was enough to be careful as I peeled the paper away. However, feel free to try it yourself – let me know in the comments if it works.


