
This guide to framing artwork will help you learn how to frame your art in the best way possible. After all, it’s the next logical step after creating or purchasing a masterpiece.
In general, it’s not just about choosing the right frame but also about the perfect framing technique to elevate your artwork.
So, keep reading to learn more about all the different frame styles, sizes, and materials, along with some tips on framing art.
Framing Artwork: What You Need To Know
There’s nothing like going through the experience of framing your first artwork. It’s a commemoration of getting over the phase of pinning posters to your dorm’s walls.
That said, it can also be a confusing process, trying to figure out what materials to choose and how to do it optimally.
Take a look at the following tips to help you out.
1. Frame Style
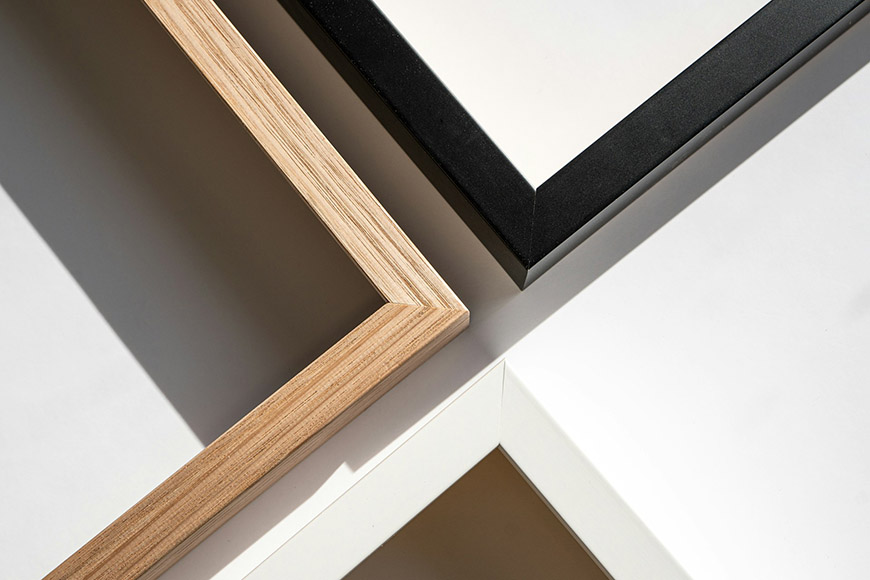
Credit: In the Making Studio
The frame style is a personal choice that depends on a person’s preferences completely. Primarily, it can impact the aesthetic of your artwork significantly.
In other words, it’s like a visual border that should guide a person’s attention toward the piece of art and complement its appearance.
For example, a thin white frame can give your artwork an elegant and polished look. On the other hand, a thick one can make a bold impact on the viewer.
Similarly, traditional artwork goes well with classic frames, while minimalist pieces may find a suitable companion in simple frames.
That said, it’s also essential to consider the subject and color palette of your piece.
On top of that, thinking about where to display the artwork matters as well. That’s because it helps create harmony with the surroundings for better aesthetics.
Take the HARD Photography Quiz! 🤯
Now it’s time to really test your photography knowledge!
(99% of people can’t get all the questions right…)

2. Matting
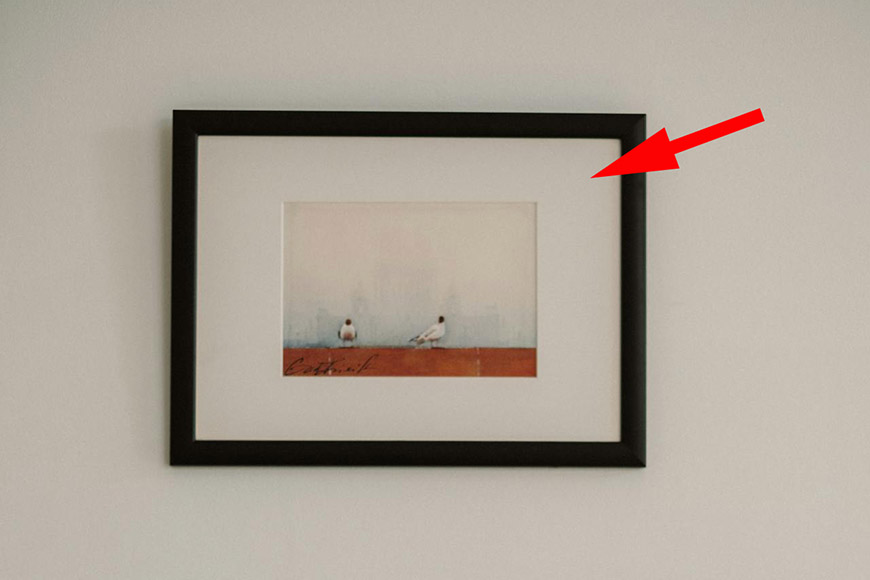
Credit: Cottonbro Studio
A mat is that border you notice around many types of artwork, acting as a protective and decorative element.
Cut to size, a mat’s opening is like a window displaying your sentimental pieces of artwork. Here are a few advantages of matting your art:
- Enhanced presentation: Matting is essential for the visual appeal of your artwork as it provides a border that separates it from the frame, drawing attention to the painting.
- Added depth: The mat also adds depth to the framed piece of art, giving it a more luxurious feel, especially for smaller artwork.
- Extra support: Along with the backing board, a mat provides much-needed support for the artwork. Plus, it helps hide any type of attachment holding the piece of art in place.
- Heightened protection: Matting creates a buffer space between the artwork and the glass or acrylic covering. Consequently, it prevents them from sticking together.
- Better air circulation: The buffer also allows vital air circulation. As a result, it helps avert moisture from condensing inside the frame and forming unwanted mold or mildew.
- More room for expansion: Properly matted artwork has room for expansion resulting from environmental changes, allowing the artwork to expand and contract freely.
- Greater coverage for imperfections: Matting can also cover many flaws in the artwork when placed strategically, especially for pieces with uneven edges.
Types of Matting
Typically, there are various types of matting, each serving a specific purpose in farming your artwork. Check out a few of the most common styles.
- Classic single mats: This is the most basic mat style, with the artwork in the middle of four equal borders. Such type provides a clean display that directs focus on the center.
- Double or triple mats: Consisting of two or more mat boards, this type creates added depth and sophistication to artwork, often using contrasting colors.
- Bottom-weighted mats: As the name suggests, this type offers more stability and balance, with the bottom border being wider than the other three.
- Multi-opening mats: This is a perfect style for creating collages or showcasing a group of related images, as it contains more than one window opening.
- Oriental mats: Similar to Asian scroll art, this style features narrow side borders and looks great horizontally or vertically, perfect for displaying elongated pieces.
- Museum style mats: Usually used by museums, this style features wide borders, with the bottom one being significantly larger. Plus, they’re mostly neutral and pale in color.
Read more on finding the right frame and mat dimensions for prints.
3. Frame Material
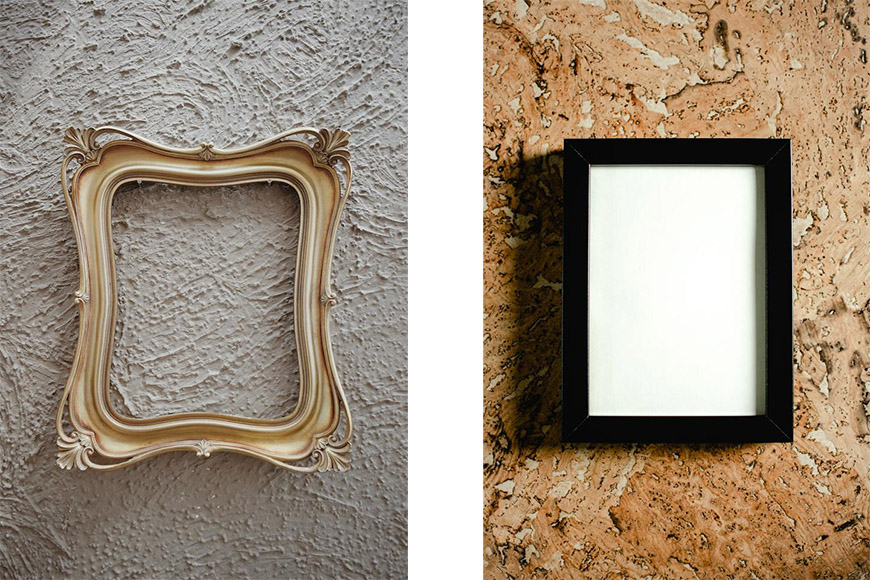
Credit: Sara Garnica (left) / Eva Bronzini (right)
When it comes to material, you have hundreds of options to choose from.
Overall, choosing the right frame depends on the artwork style, surrounding decor, your budget, and above all, your personal preferences.
Check out some of the most popular frame materials.
- Wood: Wooden frames are classic and versatile. Whether ornate or simple, they’re suitable for many artwork styles. The common types include oak, pine, and walnut.
- Metal: Often made from aluminum or steel, metal frames provide a modern and sleek look. They’re popular for abstract paintings and photographs, adding a minimalist touch.
- Acrylic or plastic: These materials are cost-effective. They’re lightweight and versatile, making them perfect for framing larger pieces of artwork on a tighter budget.
- Composite or MDF: Made from a mixture of wood pulp and resin, MDF frames also offer affordability. Moreover, they can be finished to resemble wood.
- Antique: Vintage frames usually feature mesmerizing carving and detailing. They add historical charm to your pieces, especially for period-specific ones.
- Float frames: Floater frames give the illusion that the artwork is floating within. They’re typically wooden frames, providing an elegant and contemporary display.
- Recycled frames: For environmentally conscious individuals, using recycled frames is a great option, whether crafted from reclaimed wood or other repurposed materials.
Related: Acrylic vs Metal Prints: What’s Best for Wall Art?
How Much Do You REALLY Know About Photography?! 🤔
Test your photography knowledge with this quick quiz!
See how much you really know about photography…

4. Frame Size

Credit: Los Muertos Crew
When it comes to framing size, it has to be proportional to the artwork.
By default, frames that are too small can make your art feel cramped. Contrarily, too large of a frame can overshadow the piece.
A. Standard Size Artwork
For artwork of regular sizes, framing isn’t a huge issue. You just need to go to the frame shop and buy a standard-size frame with a mat that fits your art piece.
Typically, a ready-to-use frame comes with a pre-cut custom mat that covers about 0.25” more of your art piece than the size advertised.
So, check out the following list of frame sizes to help you select the perfect one.
| Artwork Size | Mat Size (Frame Size) |
| 5×7” | 8×10” or 11×14” |
| 8×8” | 12×12” |
| 8×10” | 11×14” or 12×14” |
| 9×12” | 11×14” or 12×16” |
| 5×15” | 10×20” |
| 8×24” | 12×28” |
| 11×14” | 16×20” or 17×20” |
| 11×17” | 13×19” or 18×24” |
| 12×12” | 16×16” or 18×18” |
| 12×16” | 16×20” or 13×17” |
| 16×20” | 20×24” or 24×28” |
| 18×24” | 22×28” |
B. Non-Standard Size Artwork
Whether it’s a piece of odd size or original artwork of yours, there are alternative framing methods other than purchasing a standard frame. These include:
- Custom frames: Many frame shops offer custom framing options. They can create a frame tailored to the exact dimensions of your artwork for a seamless look.
- Matting solutions: Matting can be cut to fit the specific dimensions of your artwork. They provide an easy-on-the-eye buffer space and enhance the overall presentation.
- Collages: For smaller artwork, you can consider framing a few of them as a collection. You just need to experiment with different arrangements for enhancing the aesthetics.
- DIY frames: If you enjoy the hands-on approach, you may consider creating your DIY frame. You have the option to make a frame from scratch or assemble a frame kit.
How To Make a Picture Frame
For DIY lovers, making a picture frame should be a piece of cake. Not only does it allow you to be creative, but it also eliminates size restrictions.
Here’s what you need to do to make a small white frame.
Materials Needed:
- Wood: Choose a good piece of lumber that fits your preferences (make sure it’s defect-free).
- Sandpaper: You’ll need sandpaper in various grits to smooth the surface and edges of the frame.
- Nails: For chunkier frames, you need large and long screw nails. Contrarily, small frames only need thinner ordinary nails.
- Wood glue: A strong type is necessary for bonding the frame’s pieces together.
- Wood paint: As an additional step to give the frame a nice finish.
Tools Needed:
- Wood clamps: They’re perfect for holding the frame in place while the glue dries.
- Miter saw or miter box: A miter saw makes cutting precise angles easier. However, you can replace it with a miter box and a simple hand saw.
- Hand Saw: Used with the help of the miter box to make straight cuts.
Steps To Follow:
- Measure the dimensions of the photo you want to frame.
- Cut four pieces of wood to make the edges of the frame.
- Use a miter saw or miter box to cut the ends of each edge at a 45° angle.
- Create a small recess on the inside of the frame using a straight bit to ensure the glass stays in place.
- As an alternative, you can make a smaller, thinner frame to attach to the back of the main one.
- Dry fit the frame pieces before gluing them to make sure they align perfectly.
- Apply wood glue to the mitered ends and join the pieces together to make your frame.
- Use wood clamps to hold the pieces tightly and wipe off any excess glue with a damp cloth.
- Once the wood glue is dry, reinforce the frame using wood screws or frame nails.
- Smooth the frame using sandpaper to achieve a polished look.
- Apply wood filler to fill any gaps (optional).
- Use white paint to give your final product a shiny color finish.
- Insert the glass sheet cut to fit the frame’s size (you may use plexiglass or any type of clear plastic as an alternative).
- Cut a piece of backing board or use cardboard to fit the back of your white frame.
- Attach a hook or any type of hanging hardware to the back, and it should be ready for use.
Related: Best Acrylic & Glass Photo Prints for Your Walls
How To Frame Your Art
Whether an artist or an art enthusiast, framing your artwork is vital for preserving and presenting it.
So, here’s a step-by-step guide on how to frame your art.
Materials Needed:
- Your piece of art
- The frame
- Matting
- Glazing (glass or acrylic)
- Backing board
- Mounting materials (This may include acid-free artist’s tape, archival corners, thumbtacks, etc.)
- Hanging hardware (D-ring hangers or other types)
- Framing screws
- A sealant or backing paper
- Lint-free cloth
Tools Needed:
- Measuring tape
- Screwdriver and pliers
- Level
- Mat cutter
Steps To Follow:
- Measure the dimensions of your artwork accurately before going to buy a suitable frame.
- Decide if your artwork would benefit from matting prior to choosing the color, material, etc.
- Consider the thickness of your art piece and the width of the matting frame you want to go for.
- Find the right frame style that would complement your art (other than frame shops, you can find a huge variety of beautiful frames online).
- Choose your preferred type of glazing. Acrylic is a lightweight option, while some specific types of glass may offer UV protection.
- Have the glazing of your choice cut to size.
- Prepare a well-lit, clean surface and cover it with a soft piece of fabric to protect your artwork from scratches.
- Assemble the frame (if disassembled) by following the manufacturer’s instructions carefully.
- If you thrift shop, you may need to figure out how to disassemble that vintage frame you found.
- If you use glass for glazing, make sure to clean it well before fixing it in place. Be careful of sharp edges.
- Cut the mat’s window to size and carefully place it within the frame, ensuring it’s centered properly (if you decide to use a mat).
- Place your artwork behind the mat and use pieces of tape or archival corners to secure it (if it’s on paper).
- For canvas paintings, make sure the stretcher bars fit well within the frame.
- With your artwork in place, seal the back of the frame using framing points or screws.
- Attach your preferred hanging hardware to the back of the frame. Always check its weight capacity to make sure it can support your framed artwork.
- Clean your frame and glaze again before hanging.
- Find a suitable location for your piece of art and use a level to make sure it’s hanging straight.
Highly Recommended

Check out these 8 essential tools to help you succeed as a professional photographer.
Includes limited-time discounts.


