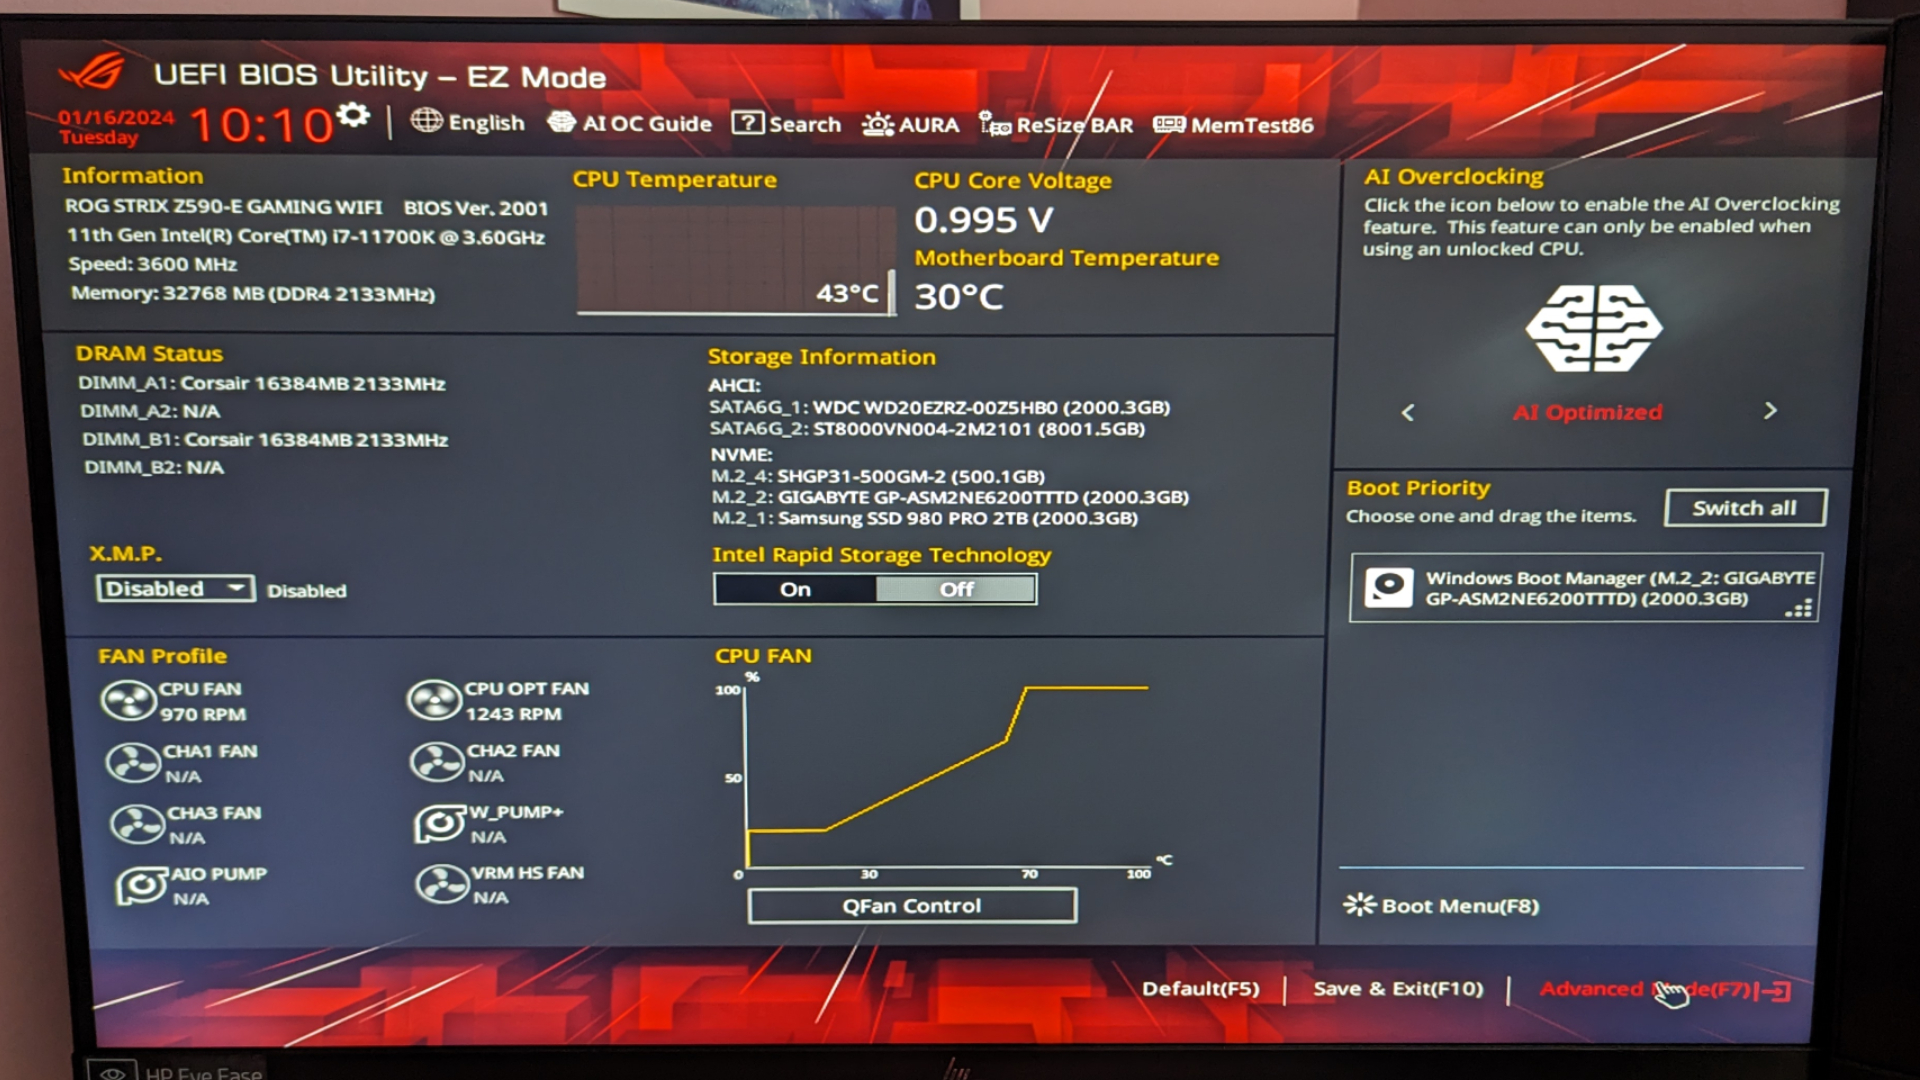
Motherboard manufacturers recommend against performing BIOS updates unless necessary, and going through that process can be terrifying. If your system works well enough as is, a BIOS update can break things that weren’t broken beforehand.
One of the many things that can go wrong is that your motherboard might no longer recognize your M.2 SSD. And if you happen to have your Windows operating system stored on that device, you might be scrambling with panic and uncertainty.
This happened to me a few days ago. After updating my BIOS, my computer rebooted I became trapped at the BIOS menu. Windows wouldn’t boot, and the motherboard couldn’t find the drive where it was installed.
As any sane person would, my heart sank, I cried for a bit, and I screamed about how much computers suck before finding the courage to troubleshoot. The solution was simpler than I thought, but the logistics of the situation are bizarre and frustrating. If you’ve found yourself in my exact position, here’s how to have your BIOS detect your M.2 SSD.
How to fix M.2 SSD not being recognized after a BIOS update
Keep in mind, this solution is for those whose M.2 SSD is not recognized after a BIOS update. If you purchased a brand new SSD and it isn’t working for whatever reason, your issue is likely to lie elsewhere, and could require different methods to resolve. If your SSD has suddenly stopped working, there’s a chance something more severe could have gone wrong and these steps won’t resolve the issue entirely. However, feel free to follow this guide to see if it happens to solve your problem.
If your M.2 SSD was working without issue right up until your last BIOS update, there’s one thing that is most likely ailing your PC: your BIOS update has returned the motherboard to factory default settings. It’s even possible that those defaults change between updates. This means that your M.2 slot might have been turned from on to off in the process.
Motherboards are different, so the steps you need to take to get to your M.2 SSD settings will vary. At the very least, they should be named similarly, so follow these steps anyway and see if you can find where yours rests. My motherboard model is the Asus ROG STRIX Z590-E GAMING WIFI, and if you have a relatively modern Asus ROG motherboard, the UI should look similar.
Step 1: Enter your BIOS by holding Del or F2 while the computer is booting up. The button could also be Esc, F10, or F12. If you can’t boot Windows, you’re probably stuck at this screen anyway.
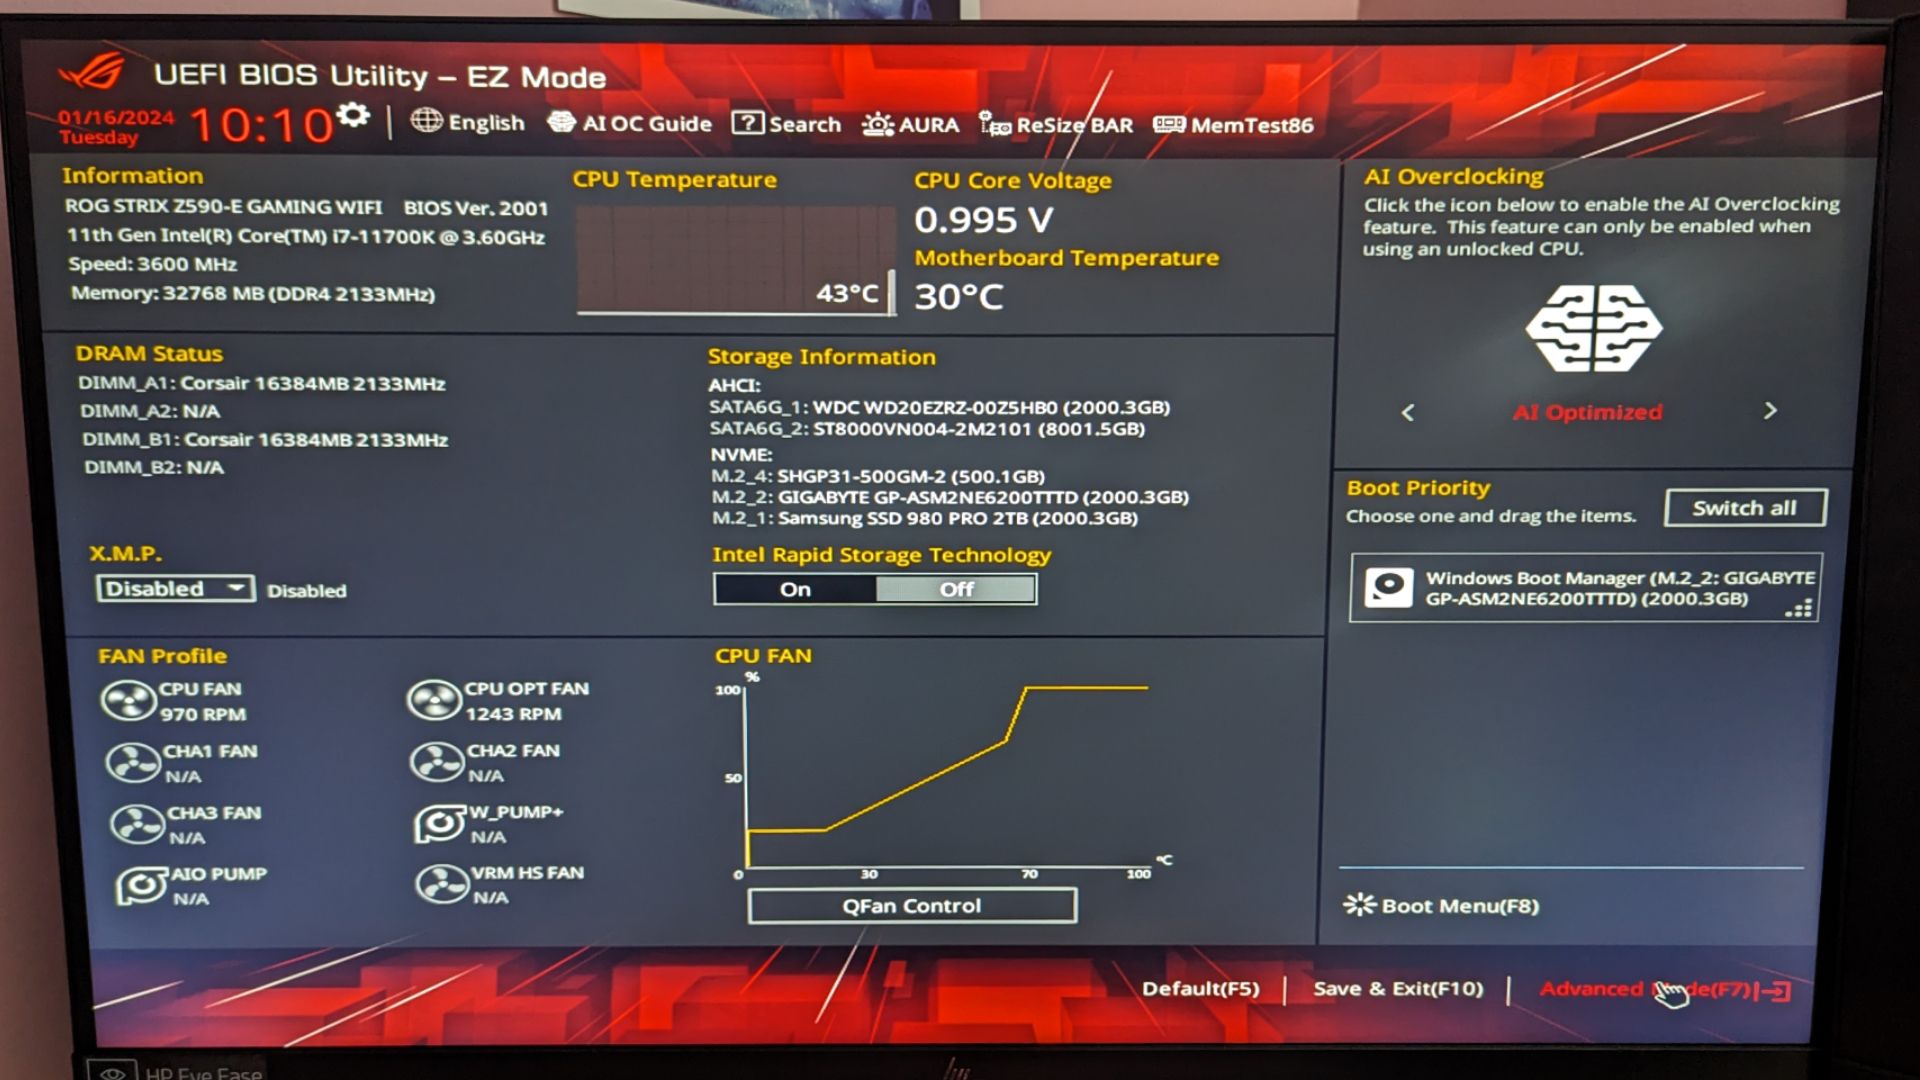
Step 2: If you’re in EZ Mode, go to Advanced Mode (mine is at the bottom right).
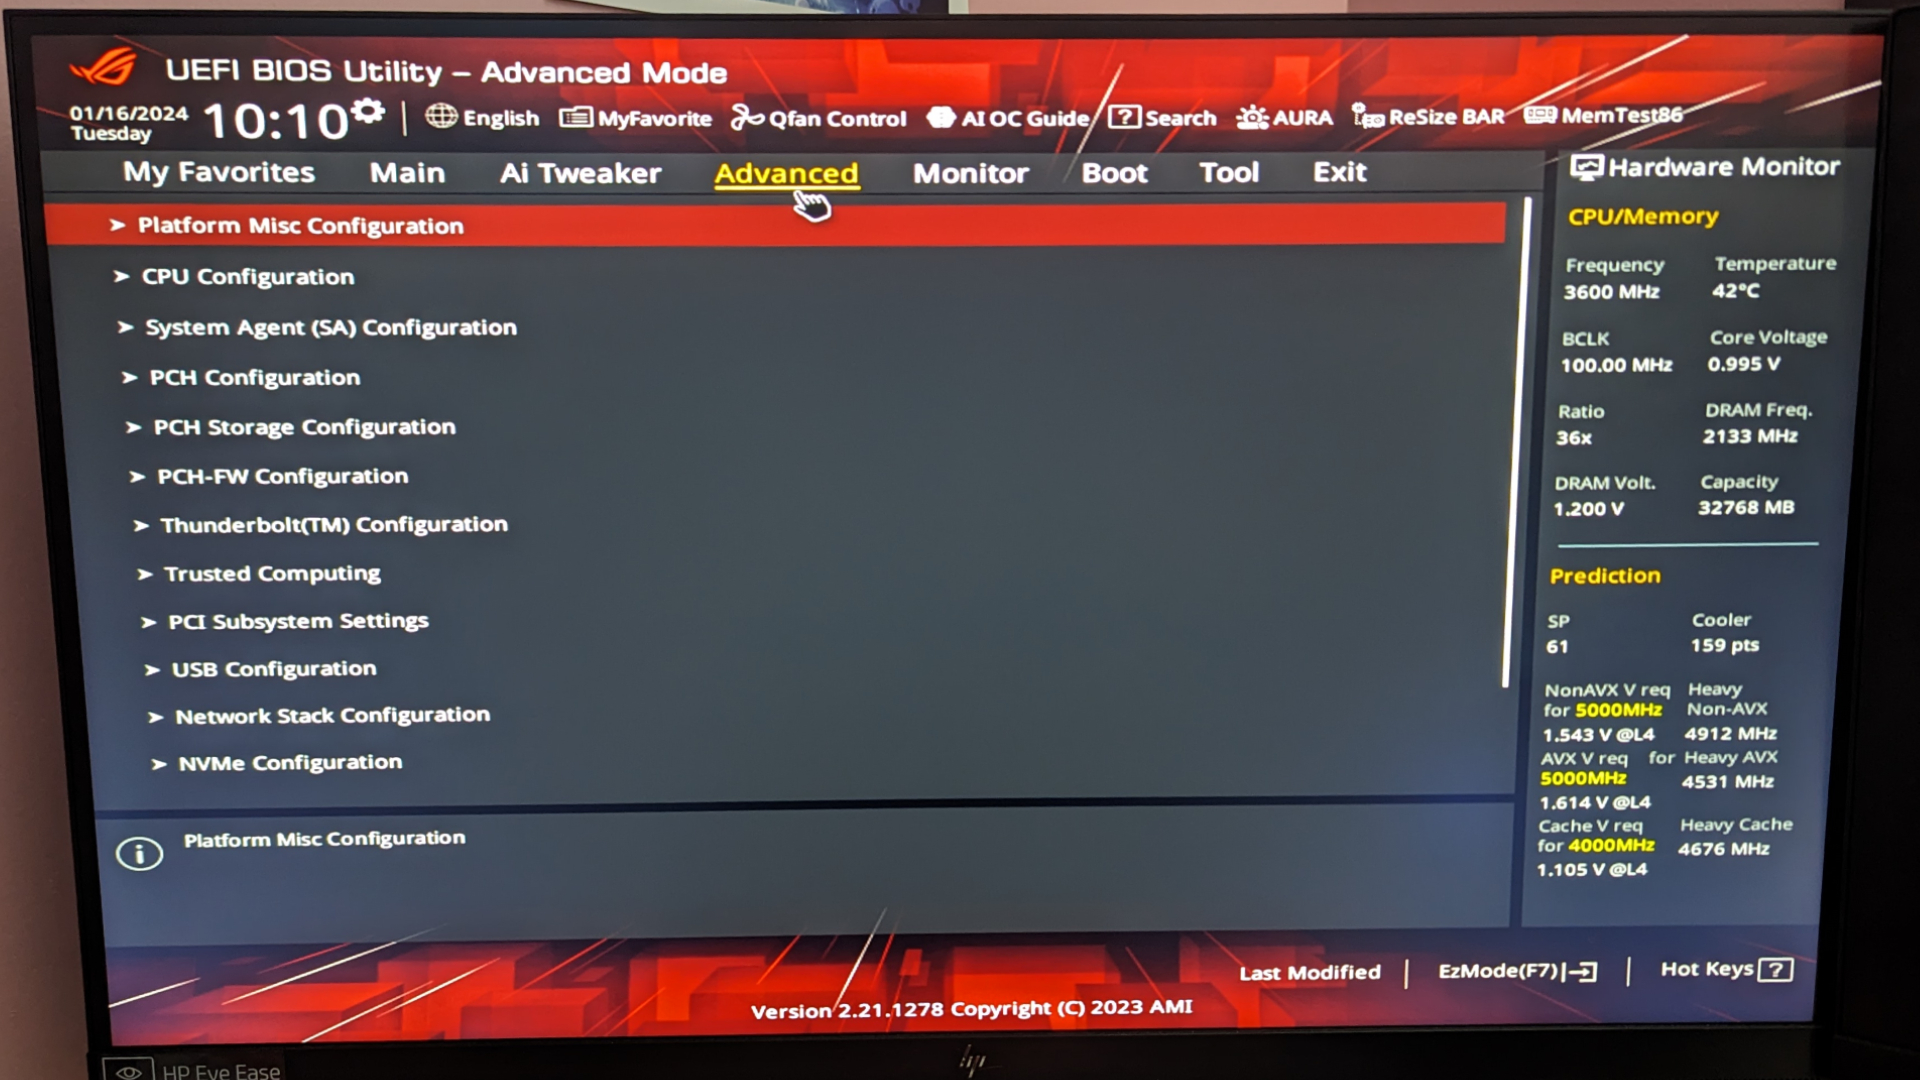
Step 3: Click on Advanced at the top.
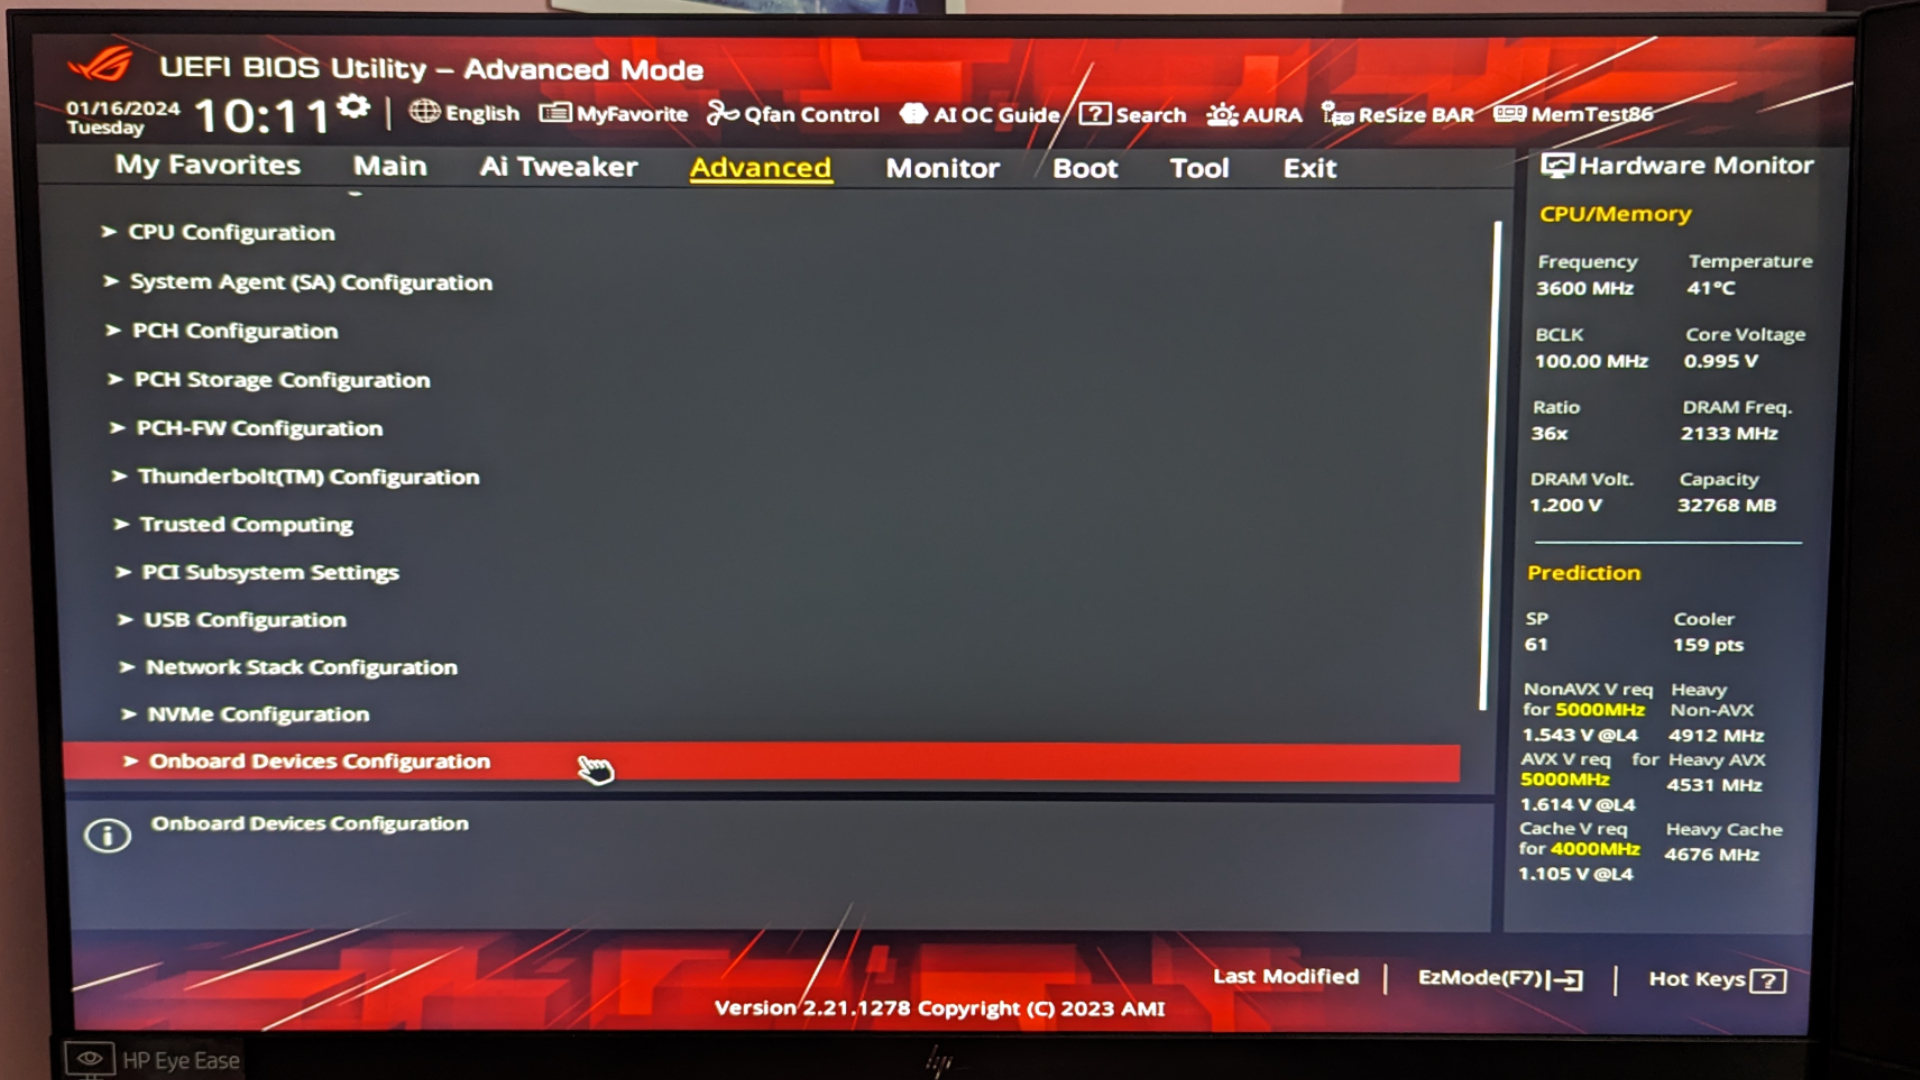
Step 4: Select Onboard Device Configuration.
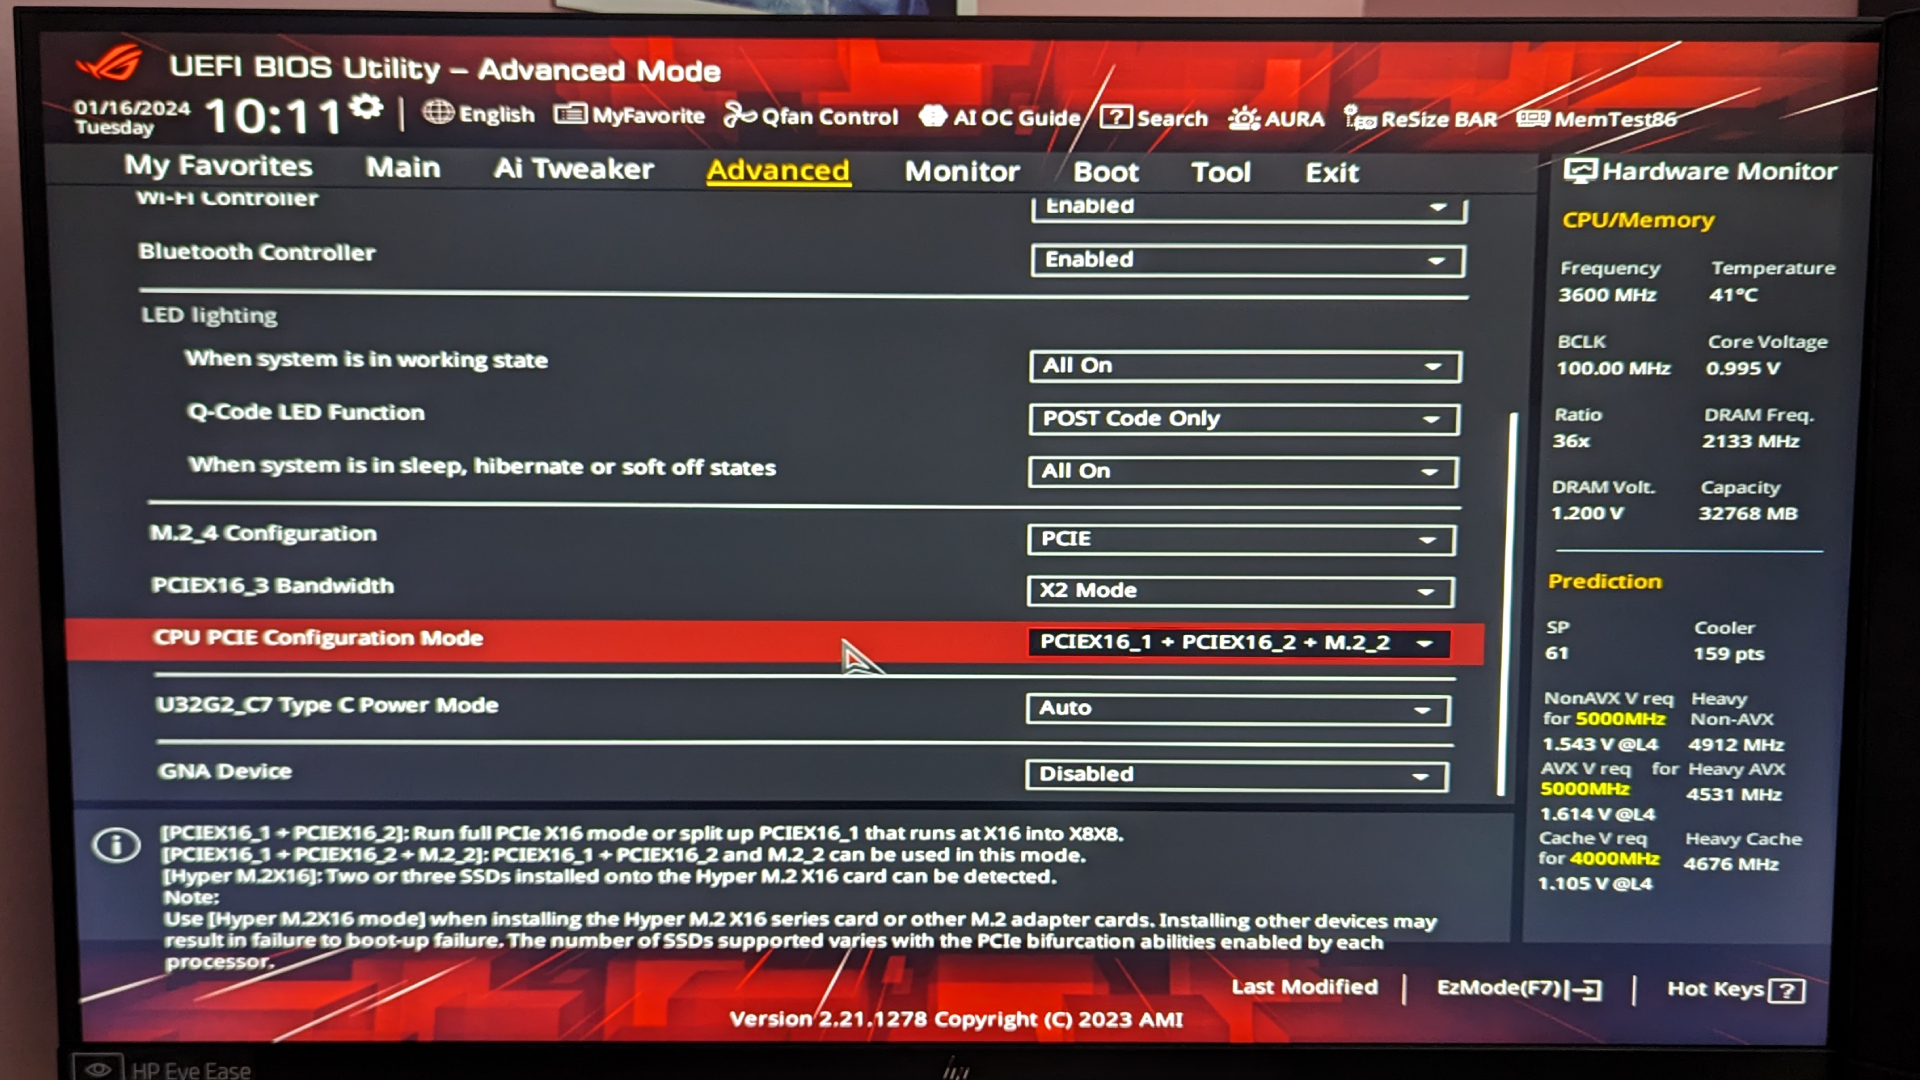
Step 5: Go to CPU PCIE Configuration Mode.
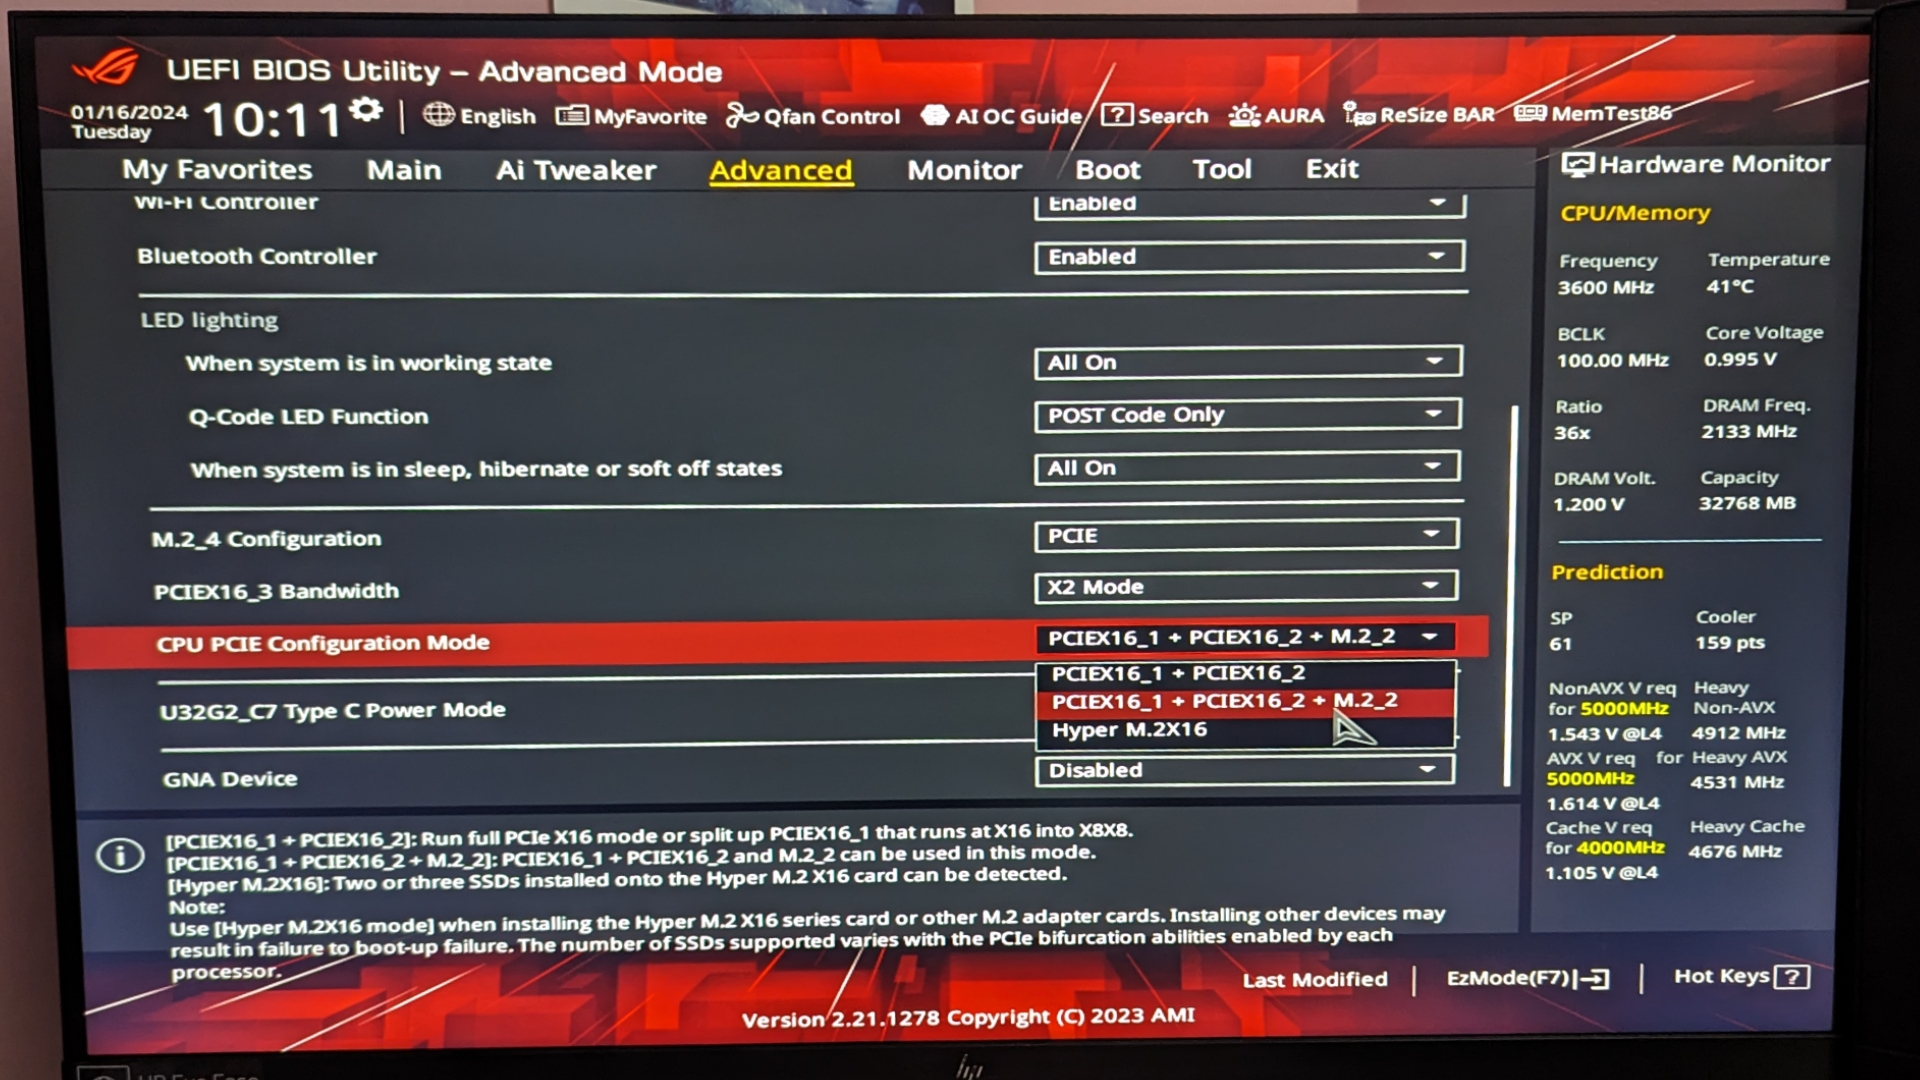
Step 6: Select PCIEX16_1 + PCIEX16_2 + M.2_2. Alternatively, it could be an issue with any of the M.2 slots, so snoop around until you find reference to the activation of an M.2 slot.
And that’s how I brought my boot SSD back from the dead, and hopefully the steps you can take to find similar results.
Finding the exact settings might take a bit of extra detective work when compared to what’s shown above. But the important part is ensuring that the specific M.2 slot your boot device is connected to is activated.
When I updated my BIOS, I had two HDDs and SSDs that were still functioning. Everything remained, except for the slot I use for my boot drive. I got that hilariously unlucky and it nearly gave me a heart attack.
It’s easy to stress out and assume that your computer is broken or your SSD got fried, but you’d be surprised how often the solution is as simple as turning the slot back on.
Back to Gaming Laptops

